
Pour-over coffee gets a lot of hype — and most of it is deserved. It's the brewing method that taught a whole generation of coffee drinkers what their beans actually taste like. But it can feel intimidating from the outside: dripper this, gooseneck that, blooms and pulses and patient pouring. The good news is that the basics are simple. You can make a great pour-over your first morning with one. This guide walks you through every piece.
Pour-over coffee is made by slowly pouring hot water over ground coffee in a paper-filtered cone (like a V60 or Chemex). It produces a clean, bright, flavorful cup. To get started: use a medium-fine grind, a 1:16 coffee-to-water ratio, water around 200°F, and pour in slow circles for about 3 minutes total. That's the whole core technique.
Why Pour-Over Is Worth Learning
Pour-over coffee is the closest thing home brewing has to a “skill” method — meaning the better you get at it, the better the coffee gets. With a French press, you steep and press. With a drip machine, you push a button. With pour-over, you are the brewing machine. That sounds harder than it is, but it's also why pour-over makes such clean, beautiful coffee: every variable is in your hands.
If you've ever bought a $20 bag of nice beans and felt let down by how they tasted out of your drip machine, pour-over is the brewer that will change that.
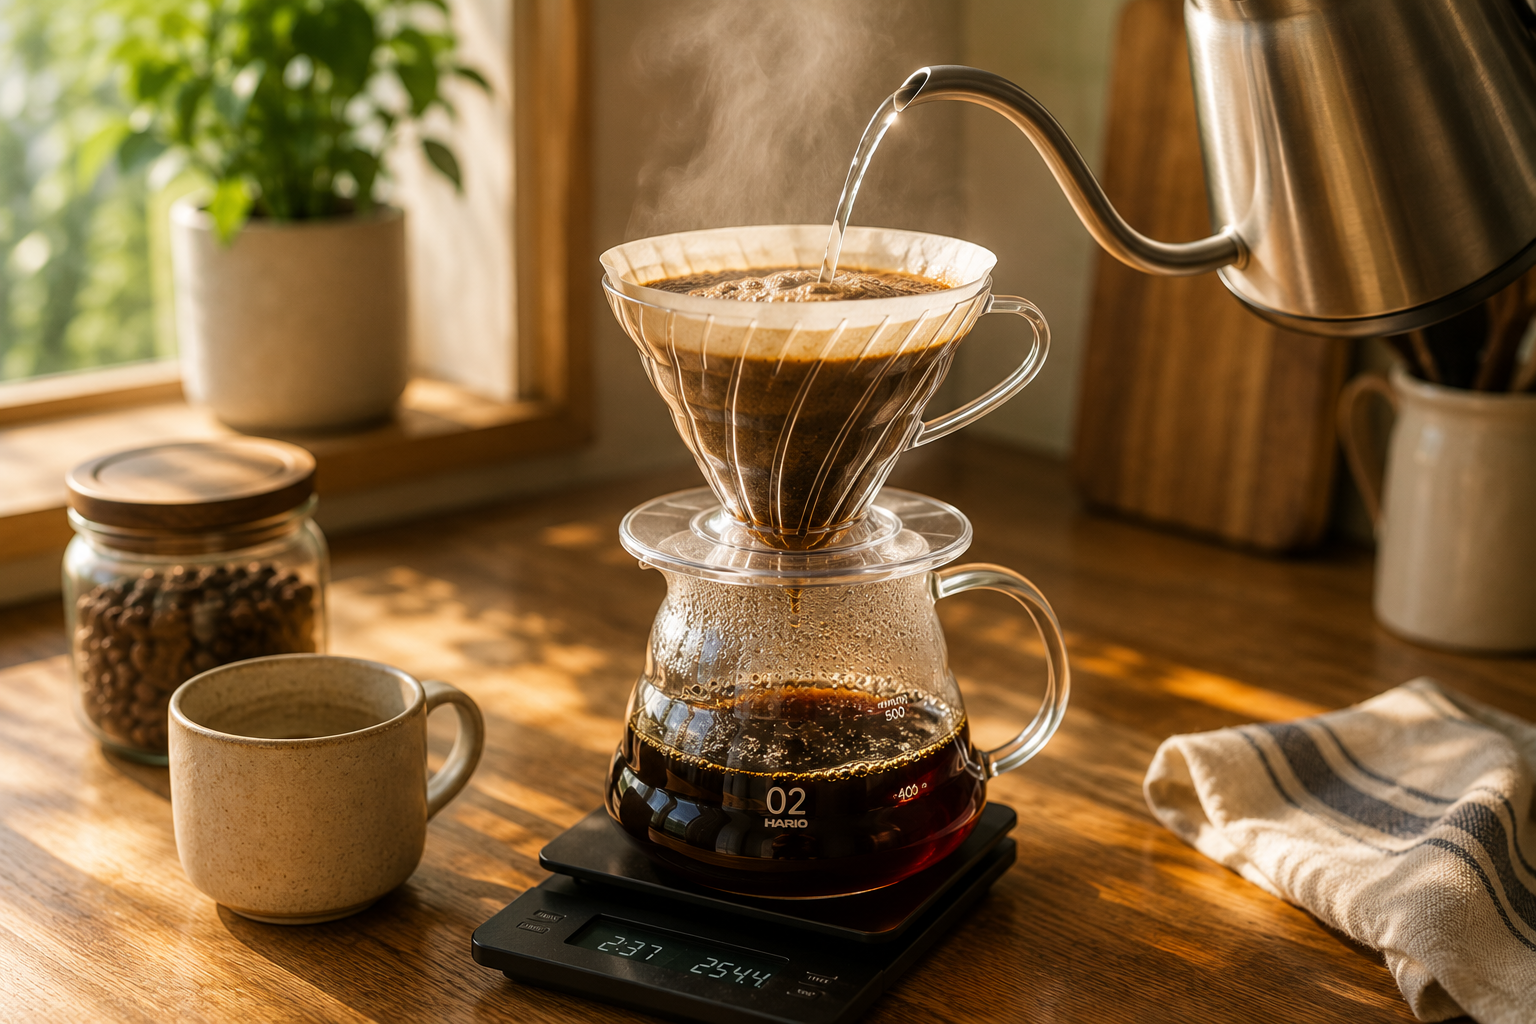
What You'll Need to Start
- A pour-over dripper — V60, Chemex, or Kalita are the three main options for beginners. More on which to pick below.
- Paper filters — sized to your dripper. A pack of 100 runs about $5–$10.
- A grinder — burr grinder strongly preferred. If you're starting cheap, a hand grinder works great.
- A kettle — a gooseneck makes pouring easier and more accurate. A regular kettle works in a pinch.
- A scale — any kitchen scale that reads in grams. This is the single most underrated piece of pour-over gear.
- Fresh coffee beans — light or medium roast, ideally within 4 weeks of the roast date.
- A timer — your phone is fine.
Total starter setup, if you buy everything new, runs $80–$150. You can spend a lot more — pour-over is one of the most equipment-curious corners of the coffee world — but you absolutely don't need to.
Why a Scale Matters So Much
If you skip everything else on this list and just add a scale to your existing setup, your coffee will already get noticeably better. Eyeballing scoops is the #1 reason beginner coffee tastes inconsistent from one morning to the next. We dig into this in why you need a scale to make good coffee.
Picking Your First Pour-Over Dripper
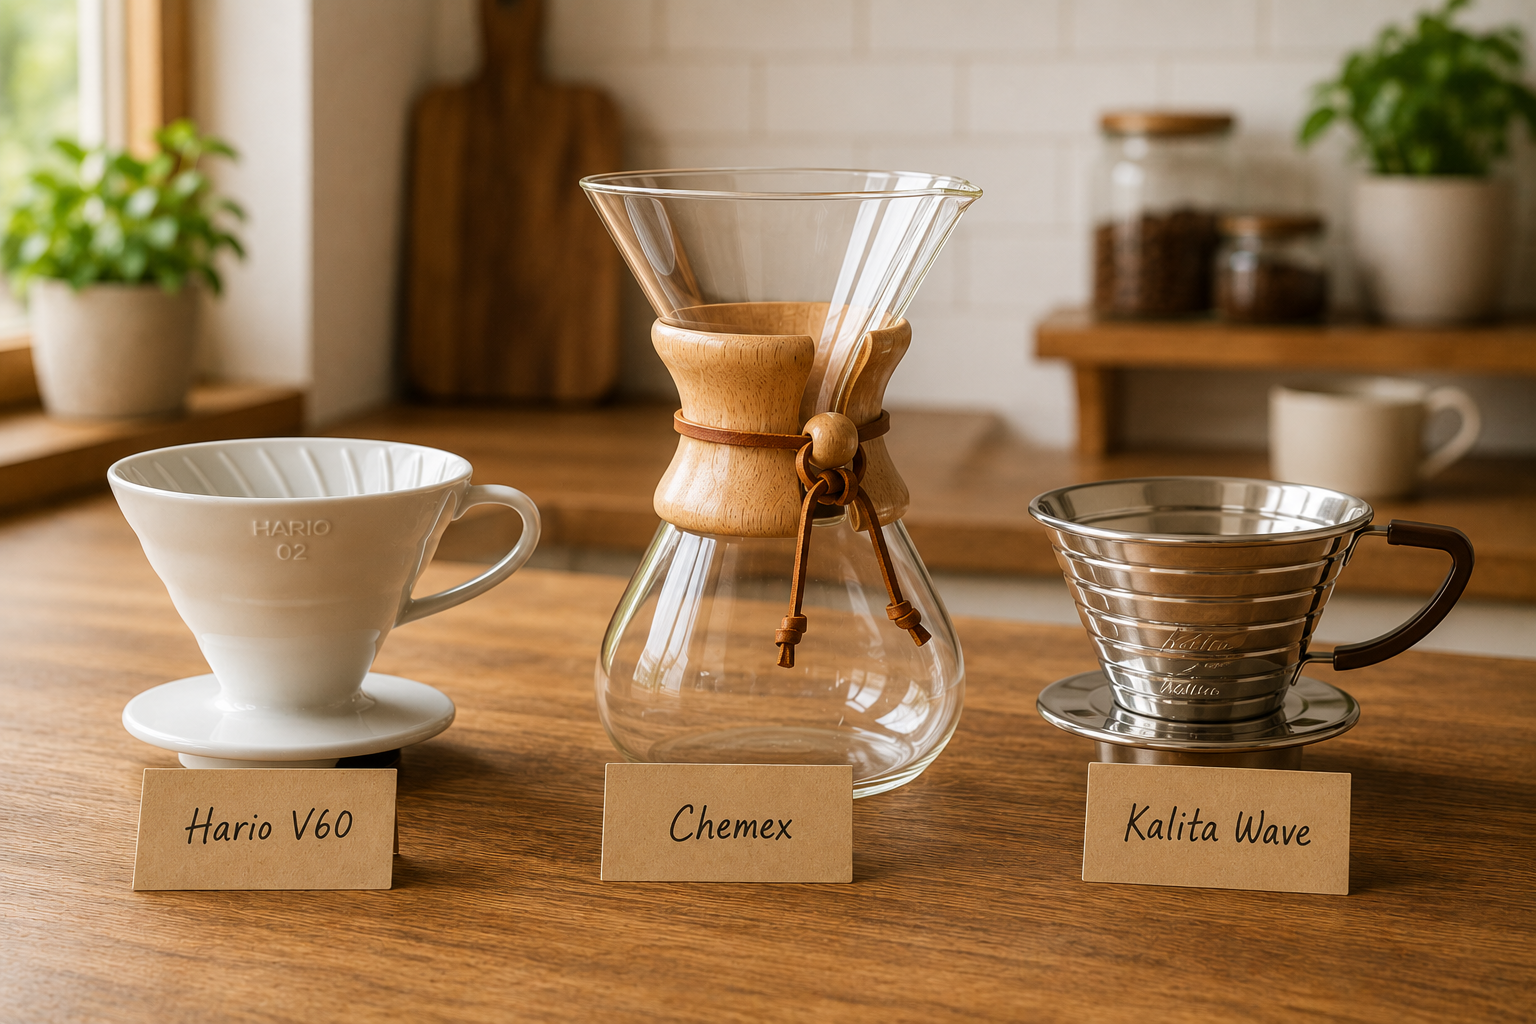
Three drippers dominate the beginner pour-over world. Here's how to pick:
Hario V60
The most popular pour-over dripper in the world. Cone-shaped with spiral ridges and one big hole at the bottom. Makes a bright, flavorful cup that highlights origin character. Costs around $20–$25 in plastic, more in ceramic. Best for 1–2 cups at a time.
Pick the V60 if: you want maximum flavor clarity, you're brewing for yourself, and you're okay with a little learning curve on the pour technique.
Chemex
The pretty one. Hourglass-shaped glass carafe with a thick paper filter. Makes a very clean, sediment-free cup. Costs around $45–$55 for the 6-cup model. Best for brewing 2–4 cups at once.
Pick the Chemex if: you usually brew for 2 people, you like cleaner and less acidic coffee, and you want a brewer that looks great sitting on the counter.
Kalita Wave
The forgiving one. Flat-bottomed with three small holes and a “wavy” paper filter. Less sensitive to imperfect pouring technique, which makes it the most beginner-friendly. Costs around $35.
Pick the Kalita if: you want a dripper that's easier to get consistent results from while you're learning.
If you can't decide and just want a recommendation: get the plastic Hario V60. It's the cheapest of the three, the easiest to find, has the biggest community of recipes online, and it's nearly unbreakable. Almost every coffee shop barista on Earth has used one.
The Core Pour-Over Recipe (Works With Any Dripper)
Memorize this and you'll never need another recipe to start with:
- Coffee: 20 grams (medium-fine grind, like fine table salt)
- Water: 320 grams (200°F, which is just off boil)
- Ratio: 1:16
- Total brew time: 3 to 4 minutes
Step-by-Step Brewing
- Rinse your filter. Put the paper filter in the dripper and pour hot water through it. This removes the papery taste and pre-warms your gear. Dump the rinse water.
- Add coffee. Weigh out 20g of medium-fine ground coffee into the filter.
- Tare your scale. Set it to zero with the dripper, filter, and coffee on top.
- Bloom (0:00 to 0:30). Pour about 40g of water over the grounds, just enough to wet them all. They'll bubble and puff up — that's CO2 escaping. Wait 30 seconds.
- First main pour (0:30 to 1:15). Slowly pour in small circles, starting in the center and spiraling outward, until you reach about 160g total water.
- Second main pour (1:15 to 2:00). Pour the remaining water (to 320g total) in the same slow spiraling motion.
- Wait for drawdown (2:00 to ~3:30). Let the water finish dripping through. Total time should be around 3 to 4 minutes.
- Remove the dripper. Pour, sip, and notice the flavor.
That's it. The first cup might not be perfect — but it'll usually be drinkable, and by week two you'll be making coffee that beats your local café.
The single most common beginner mistake is pouring too fast. Slow, steady, controlled pours are what separates great pour-over from mediocre pour-over. If your total brew time is under 2 minutes, you're pouring too fast. If it's over 4:30, you're pouring too slow (or your grind is too fine).
The Five Variables to Understand
Once you can brew the core recipe, these are the five knobs you'll adjust to dial things in.
1. Grind Size
Medium-fine is the starting point — roughly the texture of fine table salt or beach sand. Too coarse and your coffee tastes weak and watery. Too fine and it tastes bitter (and the water won't drain through fast enough). We cover this in depth in our best grind size for pour-over coffee guide.
2. Coffee-to-Water Ratio
1:16 (one part coffee to 16 parts water by weight) is the gold standard for pour-over. Want it stronger? Try 1:15. Lighter? Try 1:17. We explain the full ratio system in our coffee-to-water ratio guide.
3. Water Temperature
195°F to 205°F is the sweet spot. Boiling water is too hot and can scorch some lighter roasts; lukewarm water is too cold to extract properly. Most electric gooseneck kettles let you set the exact temperature.
4. Pour Technique
Slow, controlled, spiraling pours. The gooseneck spout is the secret — it lets you target exactly where the water lands without flooding the grounds.
5. Total Brew Time
3 to 4 minutes for a 1-2 cup pour-over is the right window. If you're way off either side, adjust grind size first (finer = slower, coarser = faster).
What About a Gooseneck Kettle?
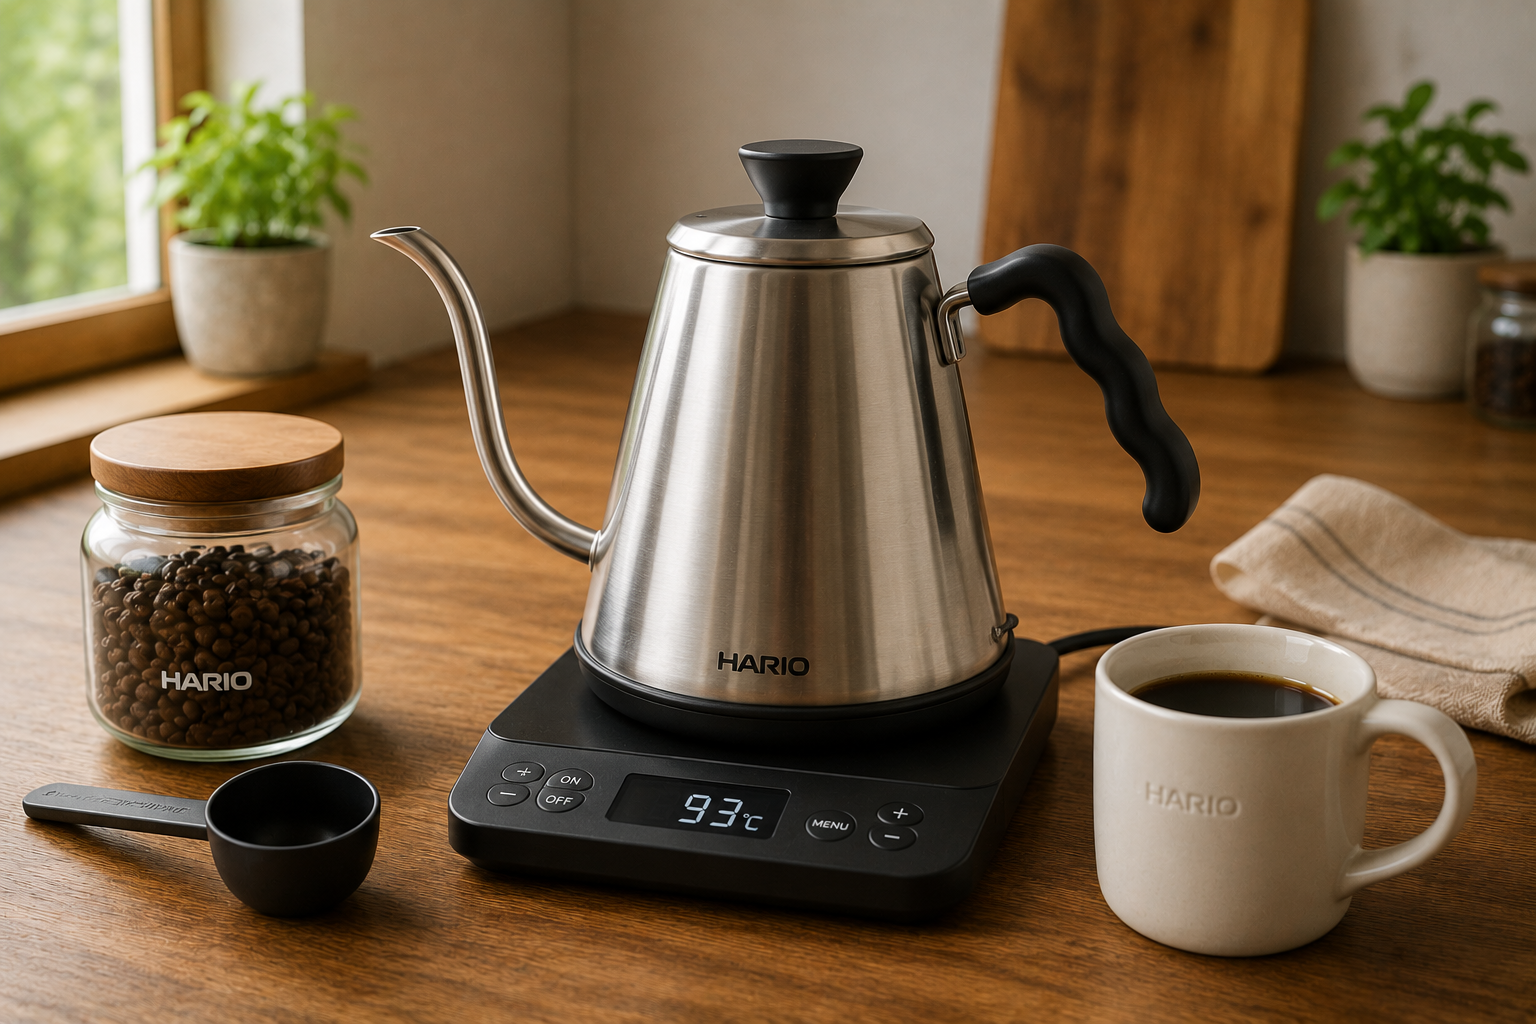
Short answer: it makes pour-over much easier, but you don't need one to start. A regular kettle (or even a heat-safe measuring cup) works for your first few brews — your pours will just be less controlled. Once you decide pour-over is for you, a gooseneck kettle is the upgrade that gives the biggest jump in cup quality. Look for an electric one with temperature control in the $50–$80 range.
Common Beginner Mistakes
- Skipping the bloom. The 30-second wait after the first small pour is where a lot of flavor develops. Don't rush past it.
- Using stale beans. Pour-over rewards fresh coffee more than any other brewing method. Look for a roast date within the last 4 weeks.
- Skipping the scale. Eyeballing 20 grams of coffee is the #1 reason beginner pour-over tastes inconsistent.
- Pouring too fast. Slow down. Patience is the secret ingredient.
- Forgetting to rinse the filter. Paper filters taste like paper until you rinse them. A quick hot-water flush fixes it.
Pour-Over Cluster (Coming Soon)
This pillar is your starting point. As we publish the rest of the pour-over series, you'll find them below:
- How to Make Pour-Over Coffee: A Simple Step-by-Step Guide
- Best Grind Size for Pour-Over Coffee (Medium-Fine Explained)
- Pour-Over Coffee-to-Water Ratio (Beginner's Chart)
- Do You Need a Gooseneck Kettle for Pour-Over?
- V60 vs Chemex vs Kalita: Which Pour-Over for Beginners?
- Why Is My Pour-Over Coffee Weak? (Fix Extraction Issues)
- How to Bloom Coffee for Pour-Over (And Why It Matters)
- Pour-Over vs French Press: Which Should Beginners Choose?
- Pour-Over vs Drip Coffee: Is It Worth the Extra Effort? — coming soon
- Best Pour-Over Coffee Makers for Beginners (2026 Picks)
- Pour-over makes clean, bright, flavor-forward coffee — and it's much easier to learn than it looks.
- Start with a plastic V60 ($20), paper filters, a scale, a kettle, and fresh beans.
- The core recipe is 20g coffee, 320g water at 200°F, in 3–4 minutes. A 1:16 ratio. Medium-fine grind.
- The five variables to dial in: grind, ratio, temperature, pour technique, and total brew time.
- A gooseneck kettle is the single best upgrade once you're hooked.
What to Read Next
If pour-over feels like the right brewer for you, the next step is a proper walk-through. Start with our pour-over step-by-step guide. Comparing brewers? Check our take on the French press vs drip coffee debate to see how pour-over stacks up against other beginner options.
Disclosure: This article contains affiliate links. If you purchase through our links, we may earn a small commission at no extra cost to you. We only recommend products we genuinely believe are right for beginners. Full disclosure here.
☕ About the Author
Greg Rathbone is the founder of HomeCoffeeBeginner.com. He started this site after finding that most coffee advice online assumed you were already an expert. Every guide here is written for total beginners — tested in his own kitchen in Oklahoma, with zero snobbery.