You've probably seen videos of someone confidently flipping their AeroPress upside down, brewing inside the chamber, then flipping it back over a mug. It looks like a magic trick. It's also, honestly, a little intimidating the first time you try it. Spill the wrong way and you're cleaning hot coffee off the counter, the floor, and possibly yourself.
So is the inverted AeroPress method actually worth learning, or is it a stunt? Here's the short, honest answer for beginners — followed by the exact step-by-step if you decide to try it.
The inverted AeroPress method flips the device upside down so coffee steeps in full contact with water before pressing. It gives you more control over steep time, which can mean a richer, more flavorful cup. For total beginners, the standard (right-side-up) method is safer and easier — try inverted once you've made 15–20 standard cups.

What “Inverted” Actually Means
In a standard AeroPress brew, you screw the filter cap on, place the AeroPress on top of your mug, and start pouring. Water starts dripping through almost immediately — your “steep” is short and partly happening as the water flows past the grounds.
In the inverted method, you flip the AeroPress upside down before adding coffee and water. The plunger goes in first, on the bottom. Coffee and water sit together inside the chamber with no filter in the way. After steeping for as long as you want, you screw on the filter cap, flip the whole thing over onto your mug, and press.
The key difference: in inverted brewing, nothing drips during the steep. You control exactly how long the coffee and water are in contact.
Why Some People Swear By It
Inverted has three honest advantages over standard:
- Total control over steep time. Want a 90-second steep? You get exactly 90 seconds, no early dripping.
- Slightly richer body. Because more water spends time with the grounds, many drinkers find inverted cups have a fuller, heavier mouthfeel.
- Better for finer grinds. Fine grinds can clog and drip slowly in standard brewing. Inverted lets the water do its job before you press.
That said — none of this is magic. A well-dialed standard brew can taste just as good. The advantages matter most when you're chasing a specific style of cup, like an espresso-style AeroPress shot or a long, syrupy cup.
The Beginner-Friendly Inverted AeroPress Recipe
Here's our beginner setup. It uses the same 1:15 ratio as the standard recipe, so you'll have a fair comparison.
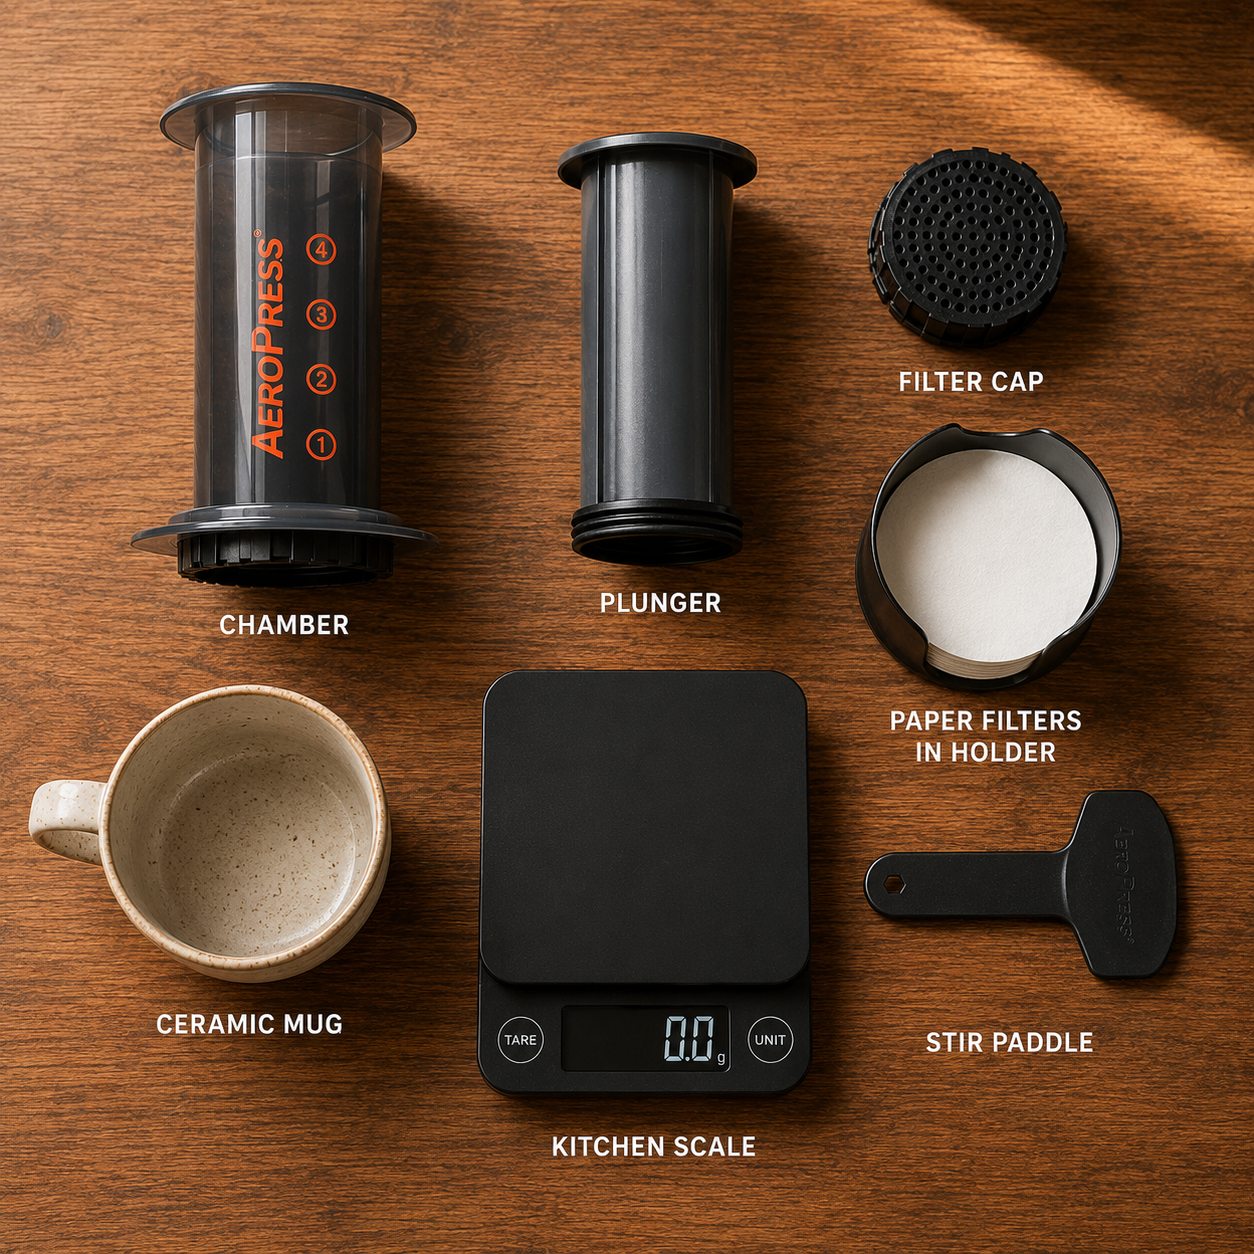
You'll need: AeroPress, paper filter, mug or carafe, kitchen scale, kettle, stir paddle (or a regular spoon).
Step 1 — Set Up Inverted
Push the plunger about 1–2 cm into the chamber, just enough that it stays seated when you flip it. Place the assembled AeroPress on the counter upside down, with the plunger acting as the base. The open chamber should now point straight up at the ceiling.
If the plunger isn't pushed in far enough, water will leak out the bottom during steep. If it's pushed in too far, you'll have less room for water. About 1.5 cm is the sweet spot.
Step 2 — Add Coffee
Add 15 g of medium-fine ground coffee into the upturned chamber. (For grind reference, our AeroPress grind size guide walks through what medium-fine actually looks like.)
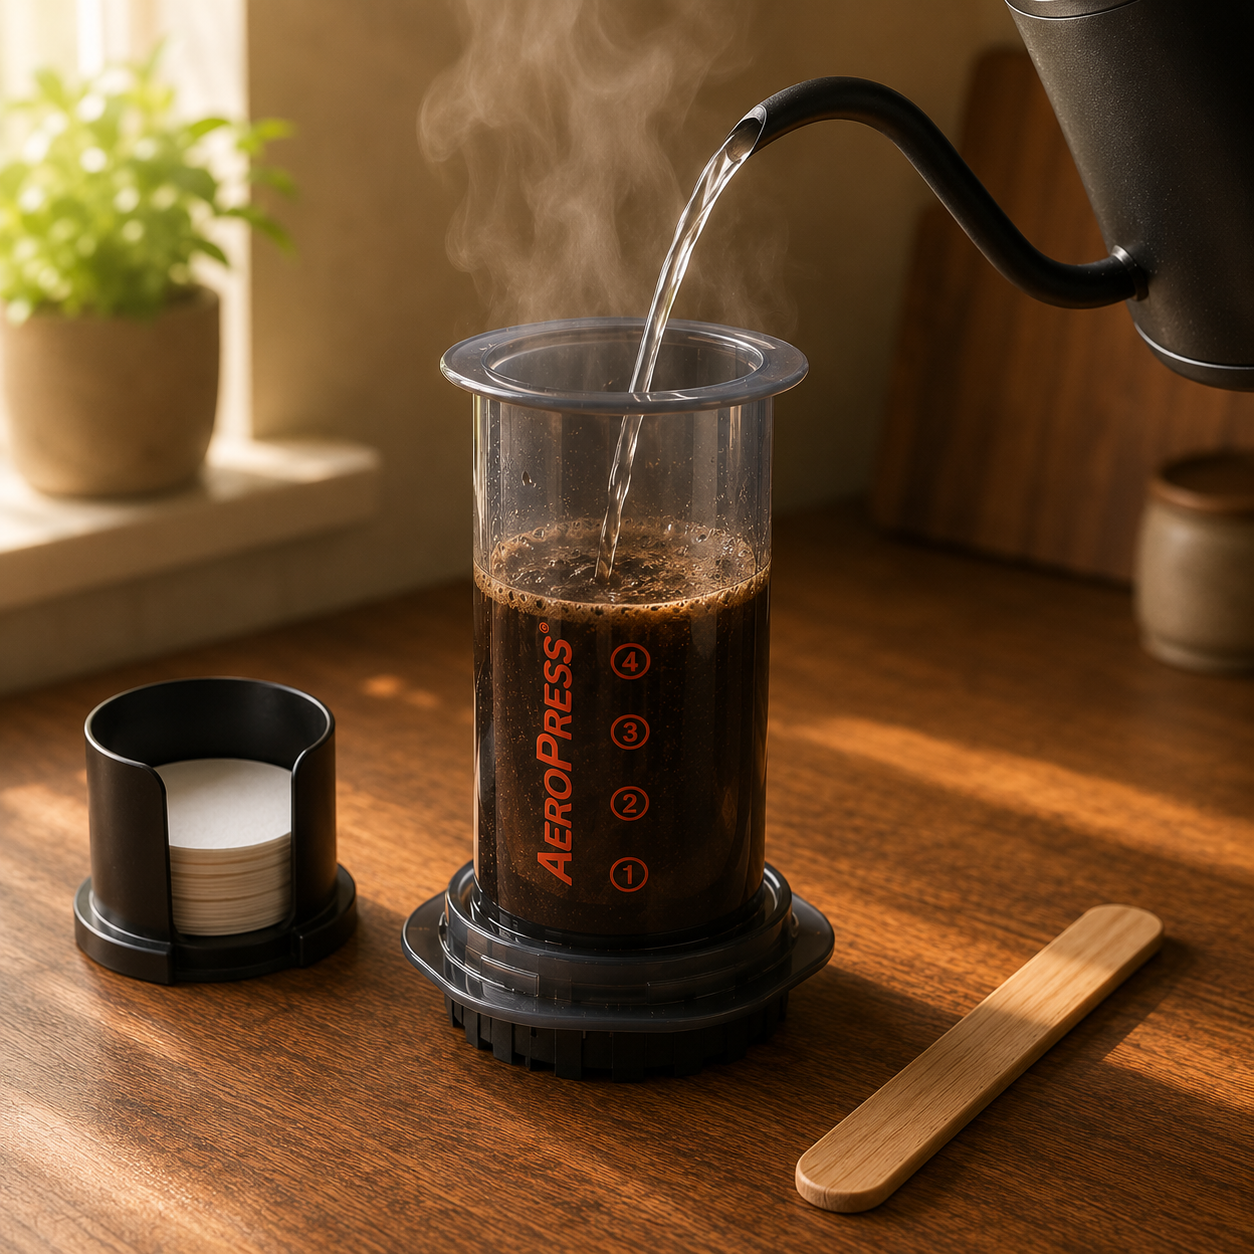
Step 3 — Pour Water
Pour 225 g of hot water (around 200°F / 93°C) directly onto the grounds. Pour in slow circles to wet everything evenly. Stir gently 3–5 times with the paddle.
Step 4 — Steep
Set a timer and let the coffee steep undisturbed. For a clean, balanced cup, steep for 90 seconds. For something fuller, go up to 2 minutes. For a brighter cup, drop to 60 seconds.
Step 5 — Cap and Flip
Place a paper filter into the filter cap, rinse it briefly with hot water, and screw it onto the chamber. Now the careful part: place your mug upside down over the filter cap, hold both pieces firmly, and flip the whole assembly over in one smooth motion. Practice the motion empty before you brew, if it makes you nervous.
Use a wide, sturdy mug — not a tall thin one. The wider the opening, the more forgiving the flip. A regular ceramic coffee mug works great.
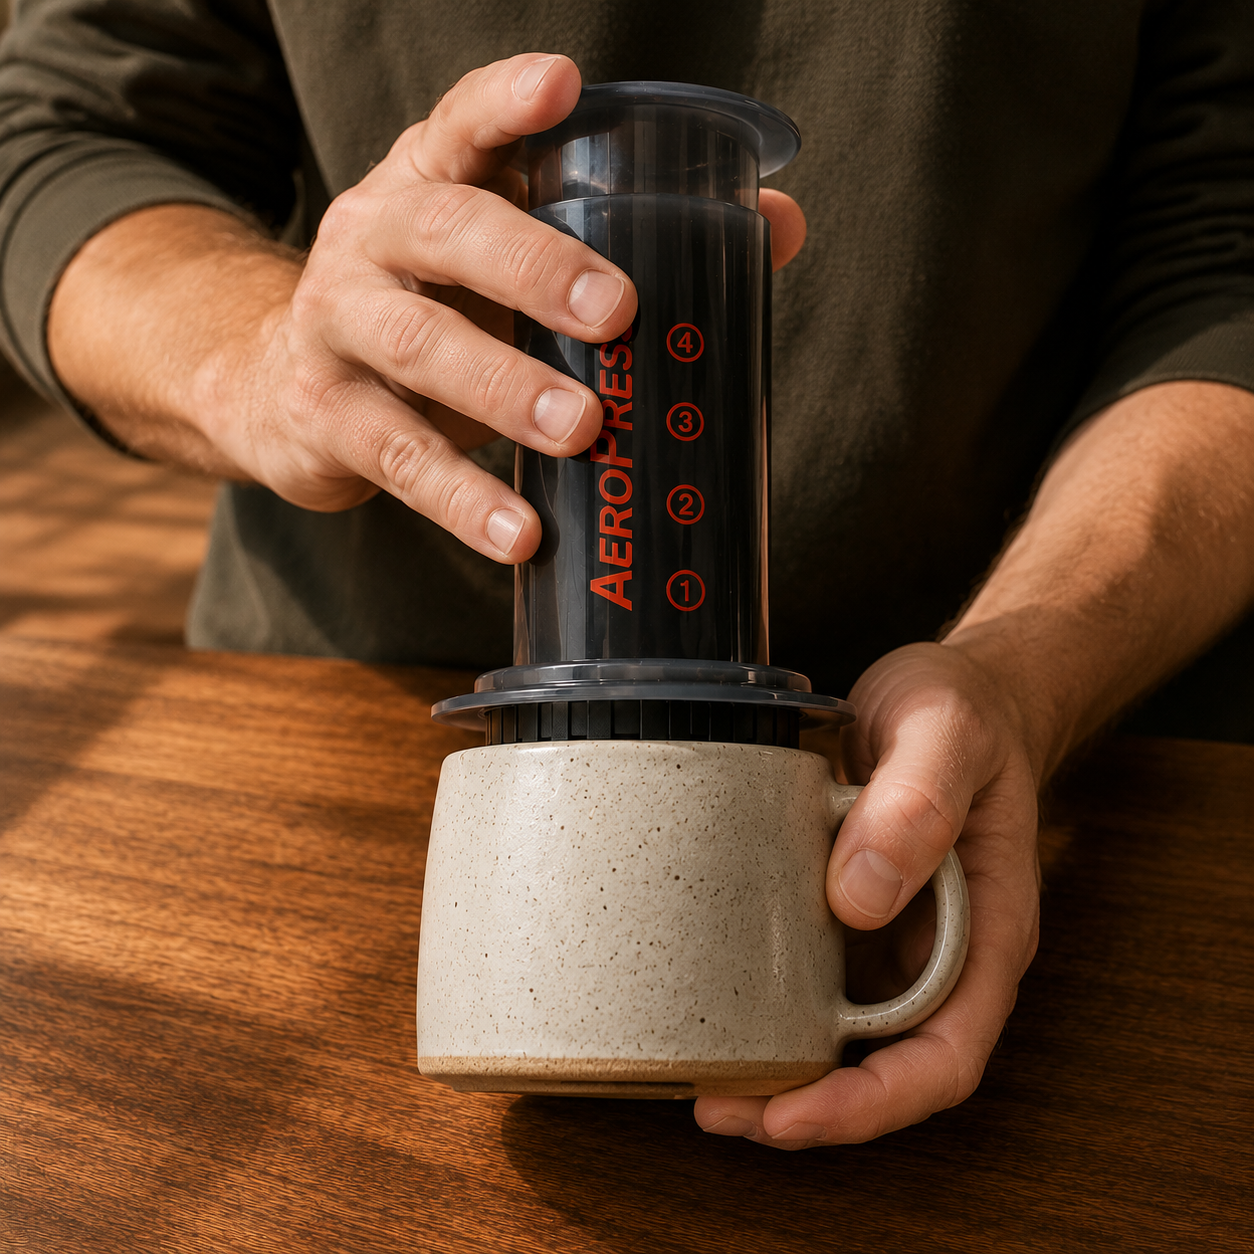
Step 6 — Press
Press down slowly and steadily. A good press takes about 20–30 seconds. Stop when you hear the hiss of air — that's the signal to stop pressing so you don't push bitter “puck” through the filter.
Inverted vs Standard: Which Should a Beginner Use?
| Standard | Inverted | |
|---|---|---|
| Difficulty | Easy | Moderate |
| Spill risk | Very low | Higher (the flip) |
| Steep control | Some drip during steep | Total control |
| Best for | First 20 brews | Tweaking and experimenting |
| Cleanup | Same | Same |
If you're brand new, learn the standard method first. It's the official AeroPress recipe, it's repeatable, and you'll build muscle memory for ratios and grind size without worrying about a flip. Once a standard cup feels boring, inverted is a fun way to start exploring.
Common Mistakes to Avoid
- Flipping too slowly. Hesitation lets coffee drip. Commit to one smooth flip.
- Forgetting to seat the plunger. Pushing it in just a few millimeters won't hold — leak city.
- Using boiling water. Water that's just off the boil (around 200°F) extracts cleanly. Full-boil water tends to scorch the grounds and pull bitterness.
- Skipping the rinse on the paper filter. Pre-rinsing knocks off the papery taste before the flip.
Is It Worth It?
- Inverted AeroPress brewing flips the device upside down so coffee steeps without dripping.
- The benefit is full control over steep time and a slightly richer cup.
- It's not harder to make — just slightly riskier because of the flip.
- Beginners should master the standard method first, then try inverted to experiment.
Inverted brewing is one of those small skills that feels intimidating once and easy forever after. Try it on a Saturday morning when you're not racing out the door, brew it side-by-side with your usual standard cup, and decide whether the difference is worth the extra step. If you're still working out the basics, our step-by-step beginner's AeroPress recipe is the right place to keep building confidence.
☕ About the Author
Greg Rathbone is the founder of HomeCoffeeBeginner.com. He started this site after realizing most coffee advice online assumes you're already an expert. Every guide here is written for total beginners and tested in his own kitchen — no jargon, no snobbery.
☕ Related AeroPress Guides