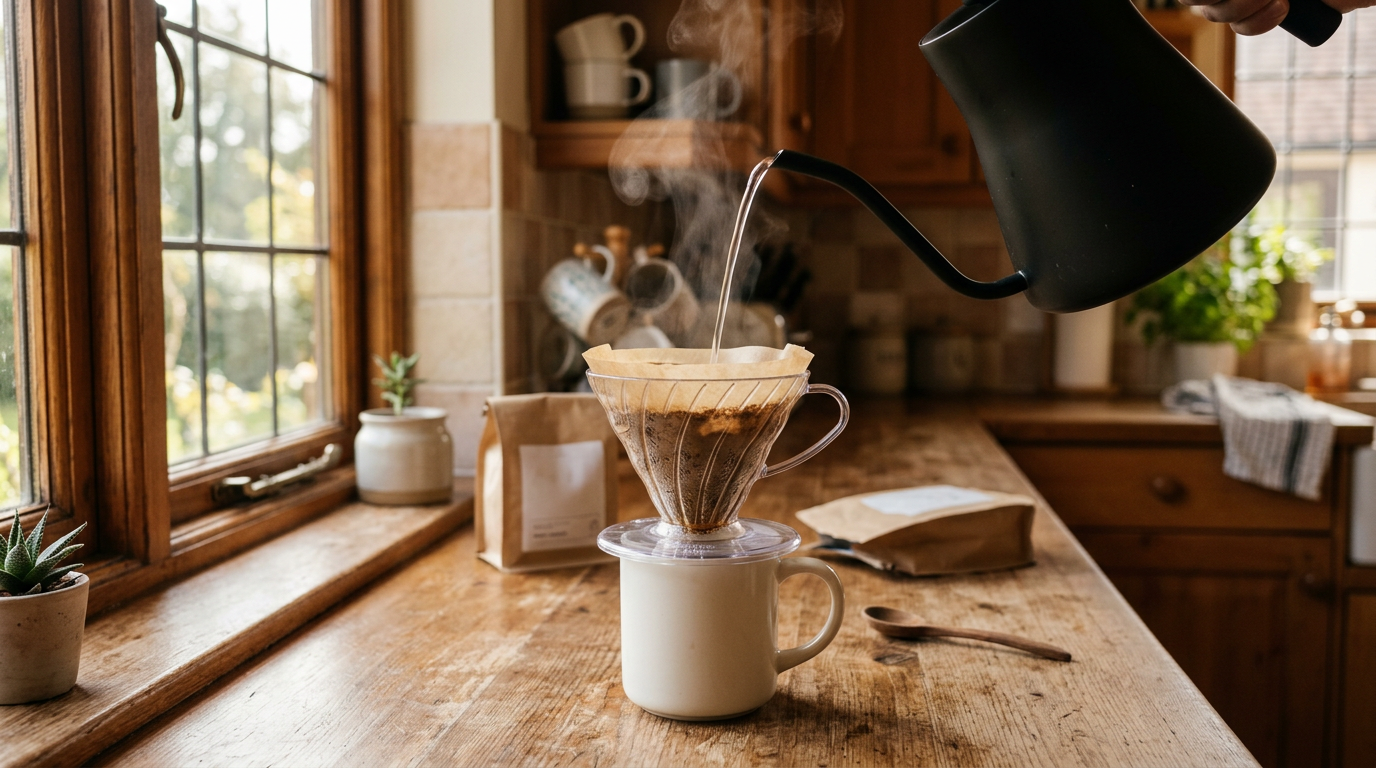
Pour-over coffee looks fancy, but here's the secret: it's one of the simplest brewing methods in the world. You pour hot water over ground coffee. That's it. No machines, no buttons, no learning a new language to order it. Just you, a filter, and a cup of coffee that tastes cleaner and more flavorful than most drip machines can manage.
If you've seen baristas make pour-over at your local coffee shop and thought it looked intimidating — we promise it isn't. The gear is cheap, the process takes about four minutes, and it's genuinely one of the most forgiving ways to level up your coffee at home. You don't need a fancy setup or a barista certification to pull this off.
In this beginner's guide to pour-over coffee, we'll walk you through exactly what you need, how to brew your first cup, and how to fix it if something tastes off. By the end, you'll have everything you need to start brewing pour-over at home with confidence.
To make pour-over coffee, place a filter in your dripper, rinse it with hot water, add about 20 grams of medium-ground coffee, then slowly pour 320 grams of water (around 200°F) in two stages — a 30-second bloom followed by a slow spiral pour. The whole brew takes about 3 to 4 minutes and gives you a clean, flavorful cup.
What You'll Need
One of the best things about pour-over is how little gear it takes. Here's the complete beginner's list:
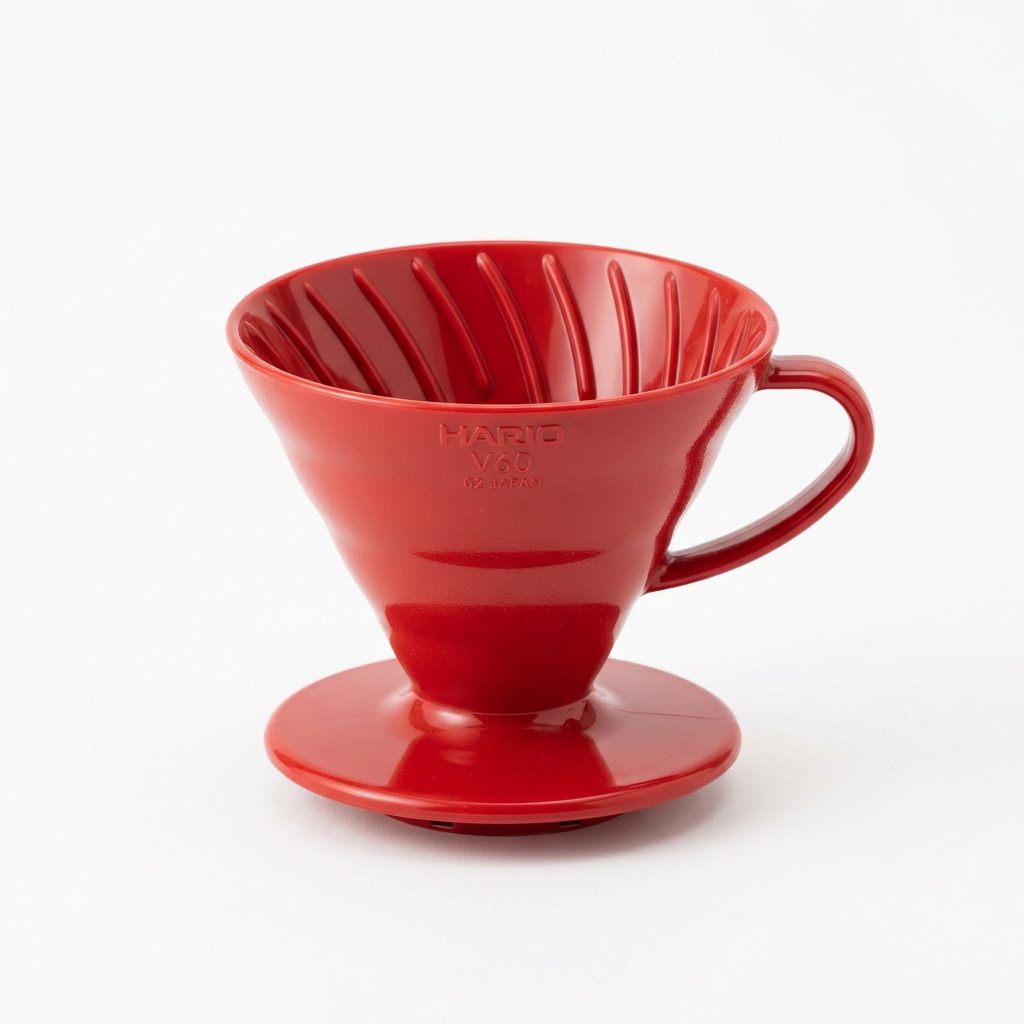
- A pour-over dripper — The Hario V60 Plastic (size 02) is the classic beginner pick. It's under $15, practically indestructible, and the most widely used pour-over dripper in the world. Check current price on Amazon →
- Paper filters — Make sure you buy filters that match your dripper (V60 filters come in size 01 and 02). A pack of 100 is usually $5 or less and lasts months.
- Coffee — A medium-ground coffee works perfectly. You want about 20 grams (roughly 3 tablespoons) for one big cup. Freshly ground is best, but pre-ground labeled “medium” or “drip” works great while you're learning.
- Hot water — You need around 320 grams (about 11 oz) heated to roughly 200°F (93°C). If you don't have a temperature-controlled kettle, just boil your water and let it sit for 30 seconds before pouring.
- A mug or small carafe — The dripper sits right on top, so pick something stable that fits the dripper's base.
- A timer — Your phone's timer is all you need.
- A kitchen scale (optional but recommended) — Weighing your coffee and water makes pour-over way more consistent. If you're serious about learning, a basic coffee scale is the best $20 you can spend on your coffee setup.
A gooseneck kettle helps too — the narrow spout makes pouring slow and controlled — but you can get away without one while you're starting out. A regular kettle or even a measuring cup with a spout will work.
Our Pick for Beginners
Hario V60 02 Plastic Dripper
The most popular pour-over dripper in the world — and it's the cheapest one, too. Lightweight, nearly unbreakable, and makes world-championship-quality coffee for under $15.
Check Price on Amazon →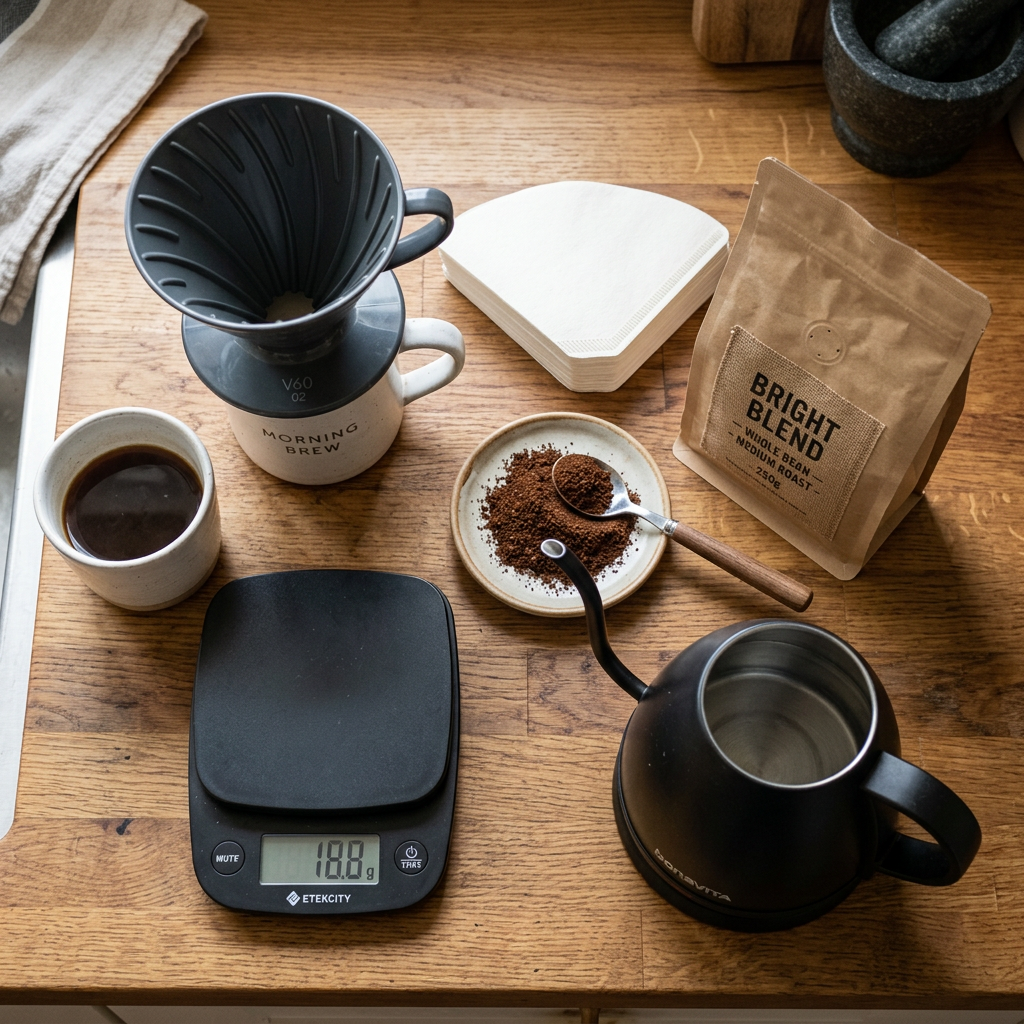
Before You Start — A Few Quick Tips
Three small things make a huge difference with pour-over:
- Always rinse the paper filter first. Place the filter in the dripper and pour a little hot water through it before adding coffee. This washes away any papery taste and preheats your brewer at the same time.
- Let your water rest after boiling. Water straight off the boil is too hot and will scald your coffee. Wait about 30 seconds after the kettle clicks off, or aim for 195–205°F if you have a temperature-controlled kettle.
- Pour slowly. Fast, chaotic pouring is the number one beginner mistake. You want a gentle, steady stream — not a gush. Slow and calm is the whole game.
If you don't have a scale yet, a standard coffee scoop holds about 10 grams of coffee, and 10 fluid ounces of water is about 300 grams. Two scoops to 10 oz of water gets you close to the ideal 1:16 ratio for pour-over. Not perfect, but it'll make a great cup while you're learning.
Step-by-Step: How to Brew Pour-Over Coffee
Step 1: Heat Your Water
Bring about 400 grams (14 oz) of water to a boil — a little more than you'll actually use, to account for the filter rinse. Let the water rest for about 30 seconds after it finishes boiling. You're aiming for roughly 200°F (93°C).
Step 2: Grind Your Coffee (or Measure Pre-Ground)
For a V60 or similar pour-over dripper, you want a medium grind — about the texture of kosher salt or table sugar. A little finer than French press grounds, a little coarser than what you'd use for espresso. If you're using pre-ground coffee, look for a bag labeled “medium” or “drip.”
Measure out 20 grams of coffee (about 3 rounded tablespoons). This is the right amount for roughly 320 grams (about 11 oz) of brewed coffee — enough for one big mug.
If you want to dig deeper into why grind size matters so much, check out our guide on coffee grind sizes and which one is right for your brewing method.
Step 3: Set Up Your Dripper
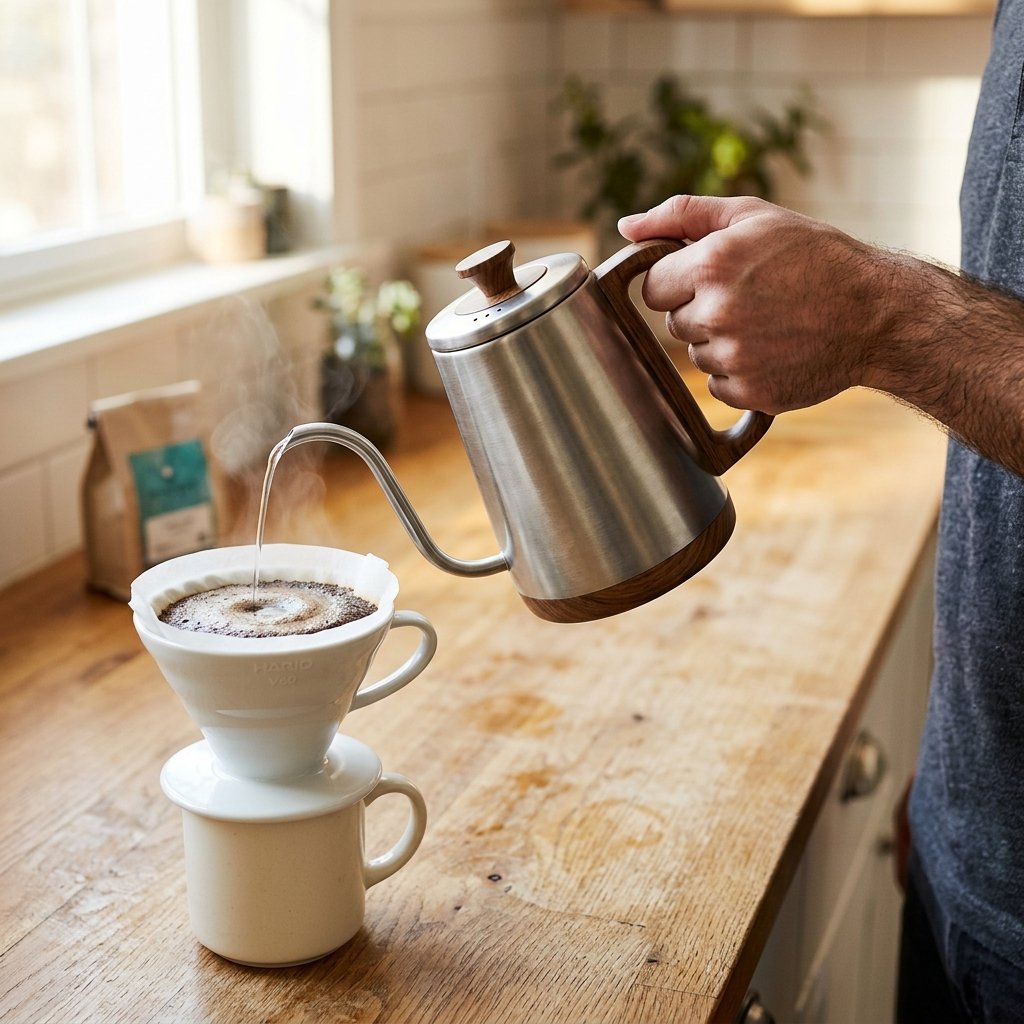
Place a paper filter inside your V60 and set the dripper on top of your mug or carafe. Pour some of your hot water through the filter to rinse it — this removes the paper taste and warms everything up. Dump out the rinse water from the mug underneath, then put the dripper back on.
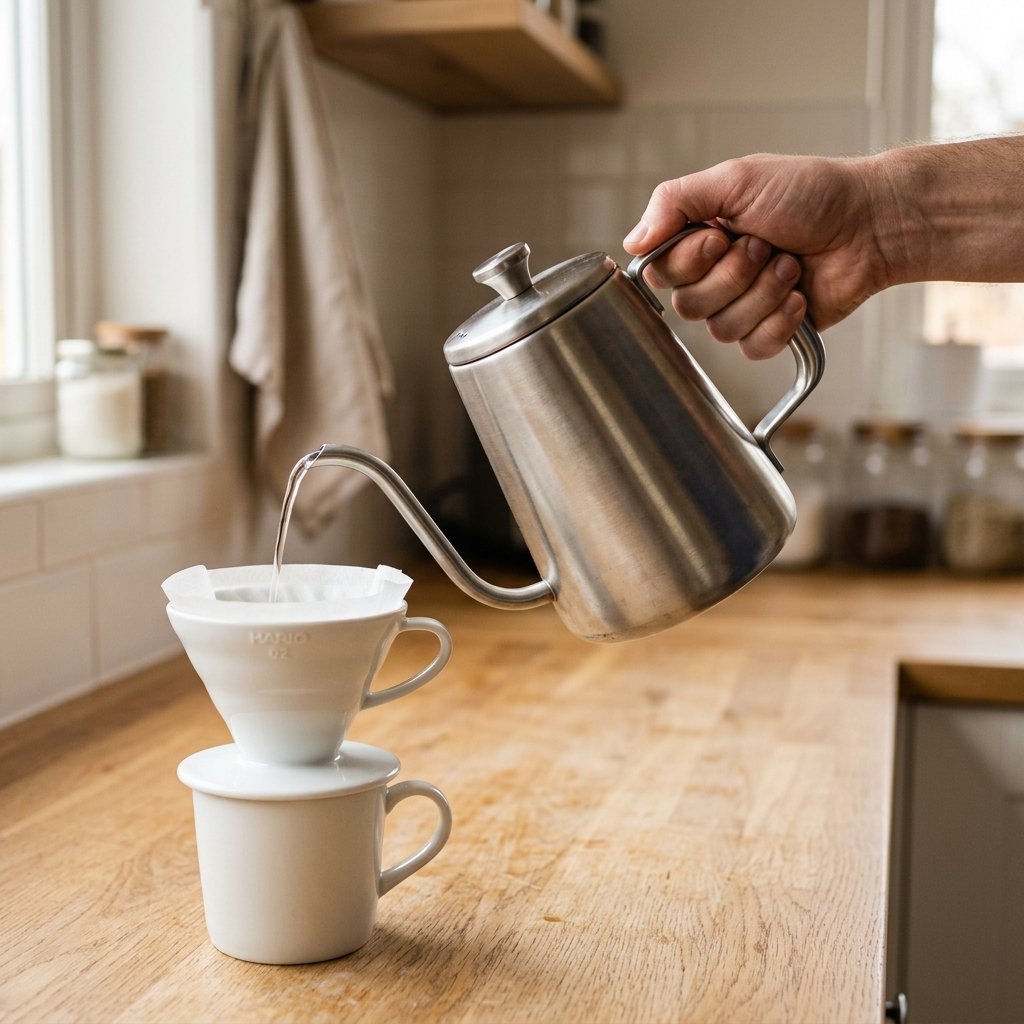
Step 4: Add Your Coffee and Start Your Timer
Add your 20 grams of ground coffee to the filter and give the dripper a gentle shake to level the grounds. Start your timer.
Step 5: The Bloom (0:00 to 0:30)
Pour about 40 grams of water (twice the weight of your coffee) gently over the grounds, making sure all the coffee is wet. You'll see the coffee puff up and bubble — that's called the “bloom.” It's carbon dioxide escaping the fresh beans. Let it sit for 30 seconds.
If your coffee doesn't bloom much, it's probably not the end of the world — but it may mean the beans are stale. Fresh coffee (roasted within the last 2–4 weeks) will always bloom dramatically. Older coffee barely bubbles at all.
Step 6: The First Main Pour (0:30 to 1:15)
Once the bloom has settled, slowly pour more water in gentle circles, starting from the center and spiraling outward. Try to keep the pour steady and controlled. Pour until your scale reads about 160 grams total (including the bloom water). This should take about 30 to 45 seconds.
Let the water drain down for a few seconds before the next pour.
Step 7: The Second Pour (1:15 to 2:30)
Pour the remaining water (another 160 grams or so) in the same spiral motion, bringing your total to 320 grams. Keep the water level fairly low in the dripper — don't fill it all the way to the top. Slow, steady, calm.
Step 8: Let It Drain
After your final pour, let all the water drain through the coffee bed. The total brew time — from the moment you started pouring to when the last drops fall into your mug — should be around 3 to 4 minutes.
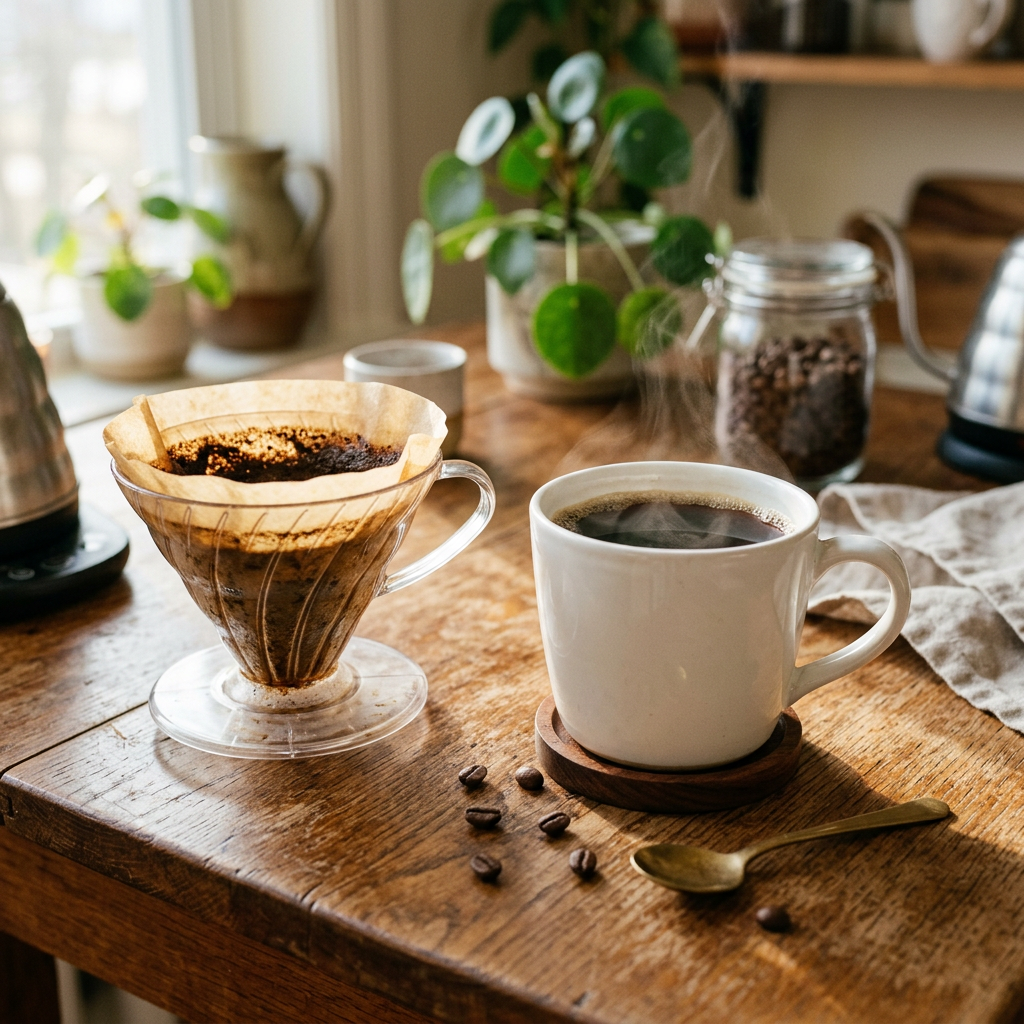
Lift off the dripper (carefully, it'll be hot), give your coffee a gentle swirl, and take a sip. That's it. You just made pour-over.
Step 9: Clean Up
Grab the paper filter by the edges and drop it in the trash or compost — coffee grounds and all. Rinse the dripper with water. Total cleanup time: about 15 seconds.
How to Know If You Did It Right
A good pour-over cup should taste clean, bright, and layered — not muddy, not heavy, and not harsh. The body is lighter than French press coffee (because the paper filter catches the oils) but the flavors come through more clearly.
If you're brewing a medium roast, expect a smooth, balanced cup with a little sweetness and maybe some fruity notes. Light roasts tend to taste brighter and more complex. Dark roasts will taste rich and bold but with less bitterness than a typical drip machine.
If your total brew time lands between 3 and 4 minutes, that's a good sign. Much faster, and your grind is probably too coarse. Much slower, and it's too fine. Small adjustments — not wild swings — are the way to dial things in.
Troubleshooting — Pour-Over Problems and Fixes
| Problem | Likely Cause | Quick Fix |
|---|---|---|
| Coffee tastes bitter or harsh | Grind too fine, water too hot, or brew time too long | Grind slightly coarser. Let water rest a bit longer after boiling. Pour a little faster. |
| Coffee tastes sour or weak | Grind too coarse, water too cool, or brew time too short | Grind slightly finer. Use hotter water. Pour more slowly. |
| Water drains too fast (under 2:30) | Grind is too coarse | Go one step finer on your grinder. |
| Water pools and won't drain (over 4:30) | Grind is too fine, or you poured too aggressively and clogged the filter | Go one step coarser. Pour more gently and in small circles. |
| Weak, watery cup | Not enough coffee, or wrong ratio | Double-check your coffee-to-water ratio (aim for 1:16). |
A lot of these problems come down to understanding extraction — what's being pulled out of the coffee when water hits it. For a deeper look at why these fixes work, read our guide on what coffee extraction is and why it matters. Once you understand the concept, troubleshooting any brewing method becomes a lot more intuitive.
If you want to really get your ratio locked in, our coffee-to-water ratio guide for beginners has you covered with simple charts.
- Pour-over coffee is one of the easiest, cheapest, and most rewarding ways to level up your home coffee.
- Use a 1:16 ratio — 20 grams of coffee to 320 grams of water — as your starting point.
- Grind medium (like kosher salt) and use water around 200°F.
- Bloom for 30 seconds, then pour the rest in slow circles. Total brew time should be 3–4 minutes.
- If your coffee tastes off, adjust one thing at a time — grind, water temperature, or pour speed.
Your Next Step
Now that you know how to brew pour-over, you've got one of the most versatile methods in coffee in your toolkit. Every bag of beans you try will taste a little different through a pour-over — that's part of the fun. You'll start to notice the difference between roasts, origins, and grind adjustments in a way that's hard to catch with a drip machine.
If you're still building out the rest of your setup, our Complete Beginner's Coffee Setup Guide covers everything from your first brewer to your first grinder to dialing in your morning routine.
Curious how pour-over stacks up against other simple brewing methods? Take a look at our guides on why a French press is a great start for beginners and why an AeroPress is a great start for beginners — they're both excellent next steps that build on the same fundamentals.
Whatever you choose, keep brewing. Every cup is a little experiment, and the more you pour, the better it gets. You've got this.
Disclosure: This article contains affiliate links. If you purchase through our links, we may earn a small commission at no extra cost to you. We only recommend products we genuinely believe are right for beginners. Full disclosure here.
☕ About the Author
Greg Rathbone is the founder of HomeCoffeeBeginner.com. He started this site after finding that most coffee advice online assumed you were already an expert. Every guide here is written for total beginners — tested in his own kitchen in Oklahoma, with zero snobbery.