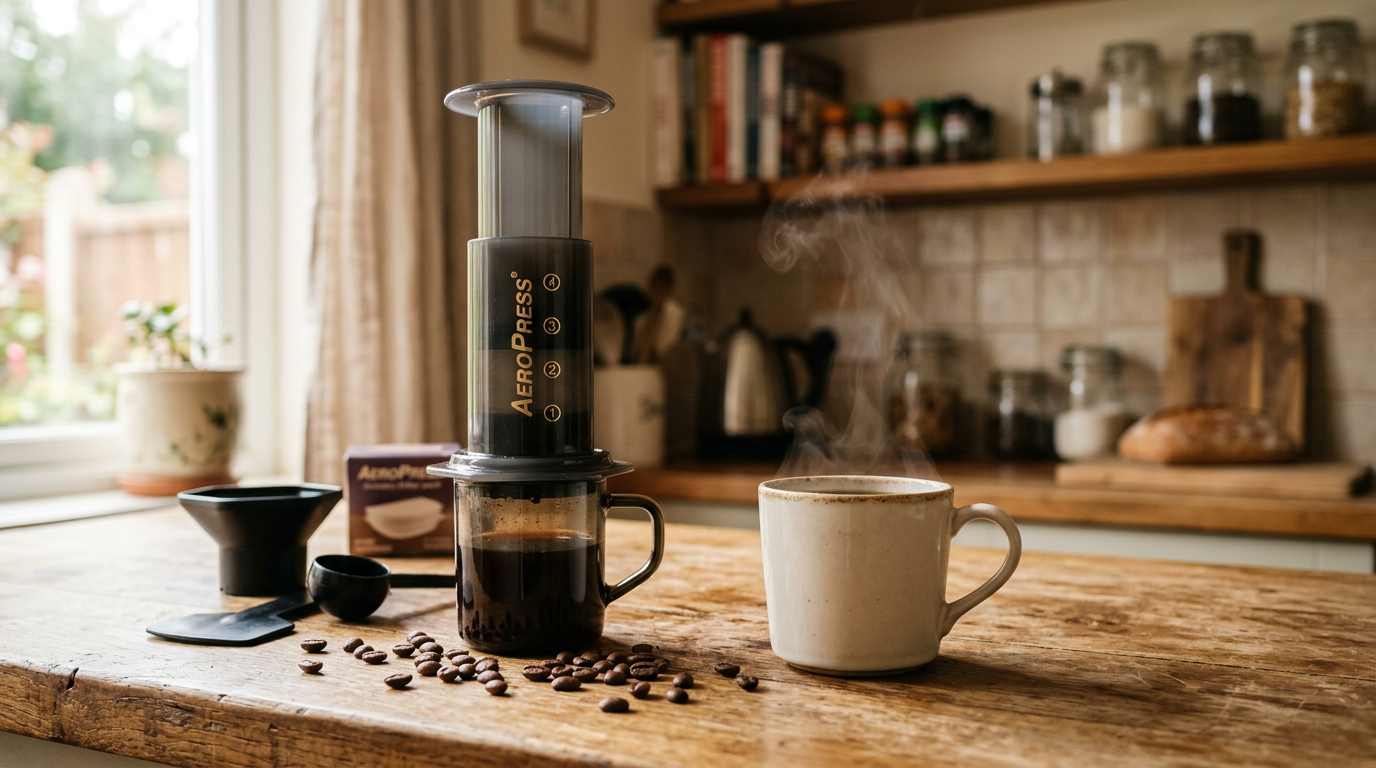
If you want a coffee maker that's nearly impossible to break, fits in a glove compartment, and brews a smooth, full-bodied cup in under two minutes — meet the AeroPress.
It looks a little strange the first time you see one. Two plastic tubes, a paper filter cap, and a stir stick. That's the whole thing. But this small, oddly-shaped brewer is one of the most beloved tools in home coffee, used by everyone from total beginners to world-champion baristas. And it's one of the easiest brewing methods to learn.
This is our complete beginner's guide to AeroPress coffee. We'll walk you through how it works, why it's so forgiving, the exact grind and ratio to use, how long to brew, and what to do when something tastes off. We've also linked to deeper guides throughout, so you can dig into any single topic when you're ready.
You don't need to read this all at once. Bookmark it, come back when you have questions, and use it as your home base for anything AeroPress.
AeroPress coffee is made by steeping medium-fine ground coffee in hot water for about a minute, then pressing the plunger down to push the brew through a paper filter into your mug. Use a 1:15 ratio (about 17 grams of coffee to 250 grams of water), water around 200°F, and a grind that looks like table salt. The whole process takes under two minutes and produces a clean, smooth, full-bodied cup with very little cleanup.
Your Complete AeroPress Guide
This pillar covers the big picture. For deeper dives into each topic, we're rolling out focused guides over the next couple of weeks:
- How to Use an AeroPress: The Beginner's Recipe — The exact routine, start to finish.
- Best Grind Size for AeroPress (Fine vs Medium) — Why grind matters more than ratio with this brewer.
- AeroPress Coffee-to-Water Ratio (Simple Chart for Beginners) — Single shot, double shot, full mug.
- AeroPress Inverted Method: Is It Worth It for Beginners? — Two ways to brew, one honest comparison.
- Why Is My AeroPress Coffee Bitter? (3 Common Fixes) — Three common causes and how to fix each one.
- How to Make Espresso-Style Coffee with an AeroPress — Strong, concentrated, almost-espresso shots.
- AeroPress vs French Press: Which Should You Choose? — Two great beginner options, head to head.
- AeroPress Original vs AeroPress Go: Which to Buy? — Picking the right model for your kitchen.
If you're brand new and just want to know whether the AeroPress is right for you, start with our honest beginner's look: Why an AeroPress Is a Great Start for Beginners.
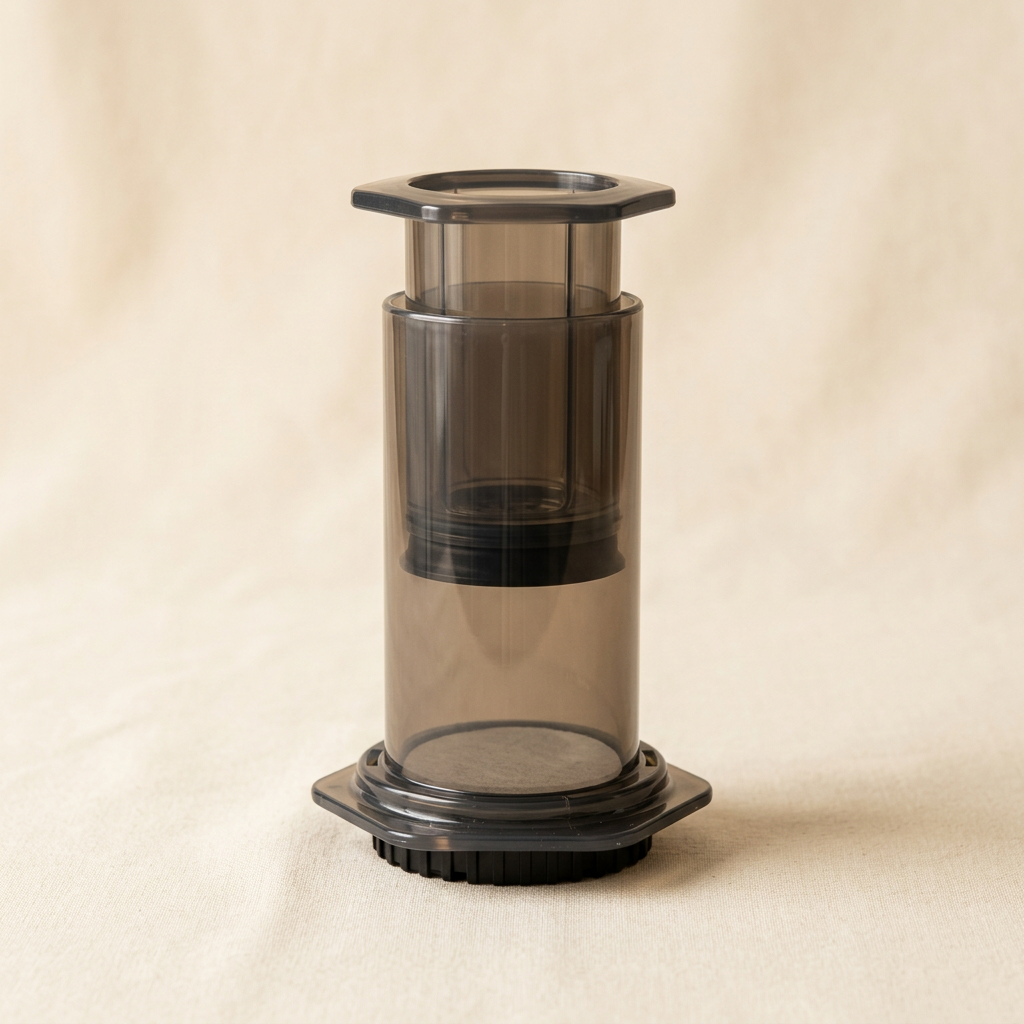
What Is an AeroPress, Really?
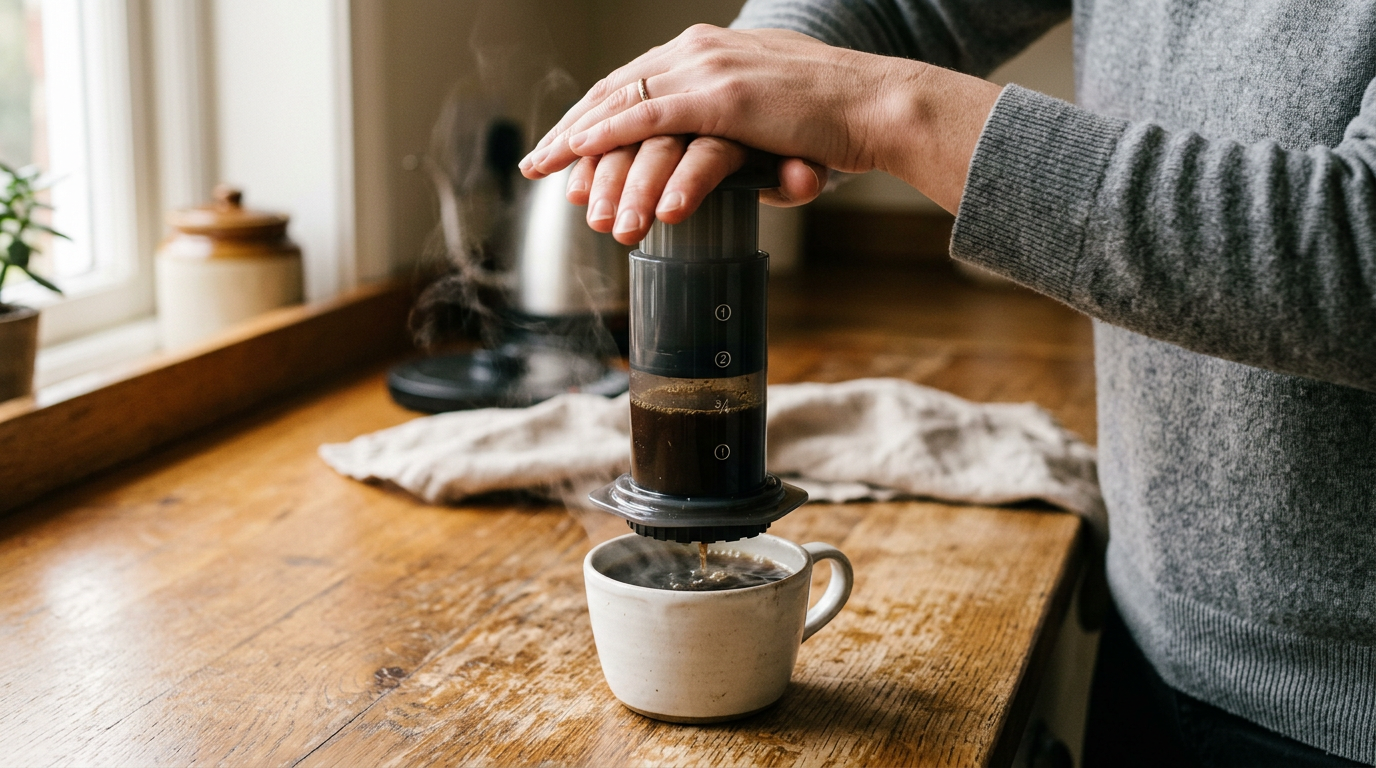
An AeroPress is a manual coffee maker. There's no electricity, no pods, no machinery — just two plastic tubes that fit together, a paper filter, and a small amount of pressure from your hand. You add ground coffee and hot water to the chamber, stir, wait less than a minute, and push the plunger down. The brewed coffee passes through a paper filter and lands in your mug.
That short brew time and gentle pressure are what make the AeroPress unusual. Most brewers either steep coffee in hot water (like a French press) or drip water through grounds (like a pour-over). The AeroPress does a little of both — it steeps for about 60 seconds, then uses pressure to force the brew through a filter in another 20 to 30 seconds. The result is a cup that has the body of an immersion brew but the clean finish of a paper-filter brew.
The AeroPress was invented in 2005 by Alan Adler, an engineer who was tired of bitter coffee. He spent two years and more than 30 prototypes figuring out how to brew a cleaner, sweeter cup at home — and the answer, he found, was a shorter brew time at a slightly lower temperature, with just enough pressure to speed things along. When he introduced it at a Seattle coffee show that November, the specialty coffee world initially dismissed it as a “toy.” It now has a world championship competition and a permanent spot in coffee shops around the world.
Why AeroPress Is Great for Beginners
If you're new to making coffee at home, the AeroPress has a lot going for it. Most of the reasons come down to two words: fast and forgiving.
Here's what we mean. With pour-over coffee, your pour speed and timing matter a lot. With espresso, you're measuring grind size to the gram and timing your shot to the second. The AeroPress doesn't ask you to nail any of that. The brew time is short, the pressure is gentle, and small mistakes don't ruin your cup the way they do with other manual methods.
A few specific reasons we recommend it to new coffee drinkers:
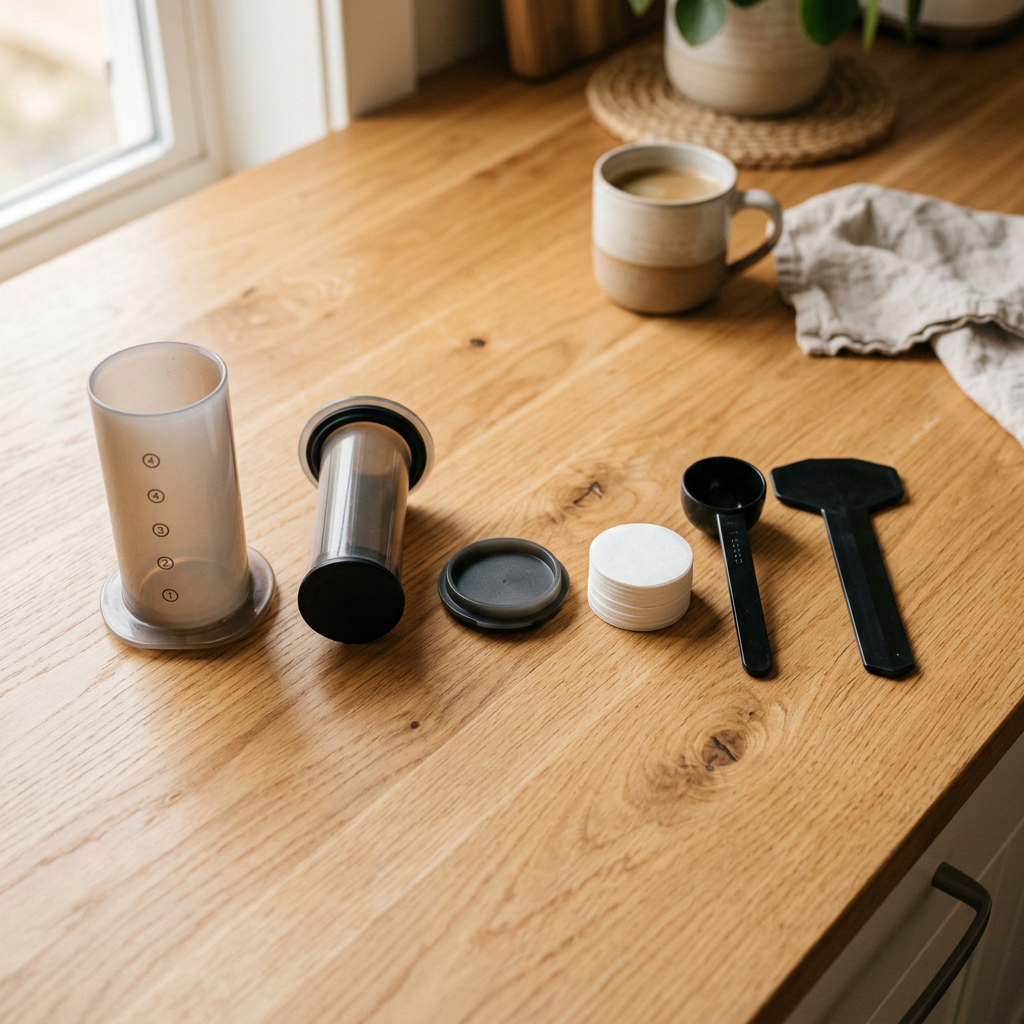
- It's affordable. The AeroPress Original retails around $40 and includes everything you need to start brewing — chamber, plunger, filter cap, scoop, stirrer, and a pack of paper filters.
- It's nearly indestructible. The body is shatterproof plastic. You can drop it, toss it in a backpack, hand it to a kid. There is no glass to break.
- Cleanup takes 10 seconds. Pop off the filter cap, push the plunger one more inch, and the spent grounds and used filter eject as a single tidy puck. Rinse and you're done.
- Brew time is under two minutes. From “water is hot” to “coffee is in your mug,” about 90 seconds. Faster than most drip machines.
- It travels anywhere. No electricity required. Works at a campsite, in a hotel room, on a kitchen counter, in an office break room. As long as you can boil water, you can brew.
- It's incredibly versatile. One brewer, many cup styles. Brew it short and concentrated for an espresso-style shot. Brew it long for a smooth mug of regular coffee. Make cold brew. Make tea.
There's one honest trade-off worth knowing: the AeroPress brews one cup at a time. If you're trying to make coffee for three people at once, you'll be brewing three rounds (or you'll want the larger AeroPress XL — more on that below). For solo coffee drinkers and couples, this is rarely a real problem. For families, it can be.
The AeroPress is the most beginner-friendly brewer we've seen for one specific reason: it's almost impossible to over-extract. The brew time is so short that even if you grind too fine or use water that's a touch too hot, the cup still tastes pretty good. That's a huge confidence boost when you're learning.
What You Need to Get Started
Let's keep this simple. Here's the full starter kit for AeroPress coffee at home.
| Item | What It Does | Approx. Price | Priority |
|---|---|---|---|
| AeroPress brewer | The brewer itself. The Original is the best all-around pick. | $40 | Essential |
| AeroPress paper filters | The brewer comes with 350. Refills are about $5 for another 350. | ~$5 / 350-pack | Essential |
| Fresh whole bean coffee | Medium roast is the easiest starting point. | $12–$18 per bag | Essential |
| A way to grind coffee | A burr grinder at home, or medium-fine ground at the store. | $40–$100 (optional at store) | Very helpful |
| Kitchen scale | Lets you weigh coffee and water for repeatable results. | $15–$25 | Recommended |
| Kettle | Any kettle works. A gooseneck isn't needed for AeroPress. | $20–$40 | Essential |
| Timer | Your phone works fine. | Free | Essential |
That's the whole list. You can start brewing excellent coffee with just the AeroPress, beans, a kettle, and your phone timer. A scale and grinder are upgrades that make everything more consistent — worth adding once you know you'll stick with it.
For a broader look at everything you might want in your home coffee setup, see our Complete Beginner's Coffee Setup Guide. For more on why a scale matters, see Why You Need a Scale to Make Good Coffee.
Our pick for a beginner AeroPress
For most beginners, the AeroPress Original is the right call. It's been the standard for two decades, the brewing chamber holds enough for a generous mug, and it costs about the same as five or six lattes from a coffee shop.
Our Pick for Beginners
AeroPress Original Coffee Maker
A beginner-friendly classic. Includes everything you need — chamber, plunger, filter cap, scoop, stirrer, and 350 paper filters — for around $40. Brews up to 10 ounces in under two minutes.
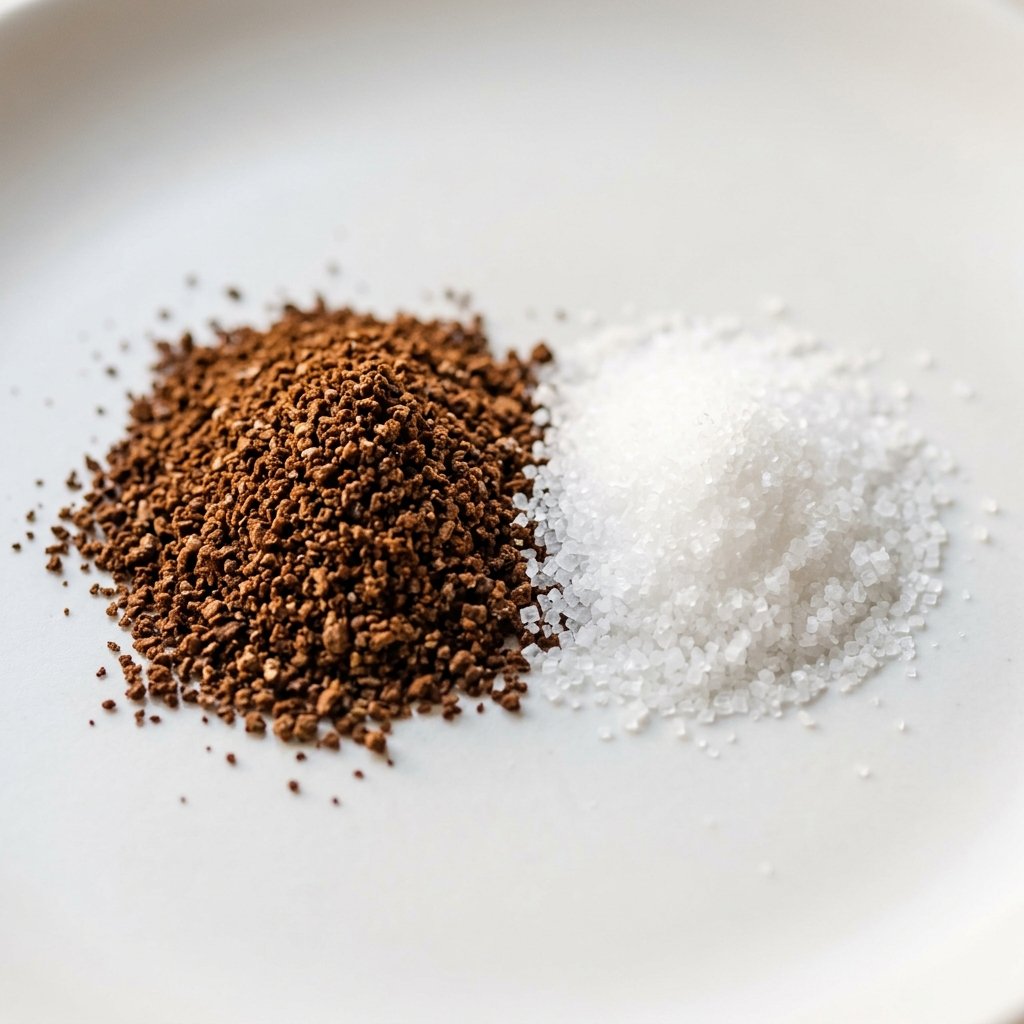
The Right Grind Size for AeroPress
Grind size is the single most important variable for AeroPress coffee. Get this right and almost everything else falls into place. Get it wrong and no amount of tweaking ratio or brew time will completely fix it.
What you want for a standard AeroPress brew: a medium-fine grind that looks roughly like table salt. Slightly finer than what you'd use for a drip coffee maker, slightly coarser than what you'd use for espresso. The grounds should feel grainy but not powdery.
Why medium-fine? The short brew time is the reason. Coarser grounds need a longer steep to give up their flavor, and the AeroPress only steeps for about 60 seconds. A medium-fine grind extracts faster, which fits the AeroPress's quick brew window. Go too coarse and you'll get a weak, sour cup. Go too fine and the plunger gets very hard to push.
If you're grinding at home, set a burr grinder a few clicks finer than your drip-coffee setting. If you're having coffee ground at the store, ask for “medium-fine” or “AeroPress” — most coffee shops know exactly what you mean. If all you have is pre-ground coffee from the grocery store, look for a bag labeled “drip” or “all-purpose.” Standard grocery-store ground coffee will work, though your cup will lean a touch thinner than it could be.
For a deeper visual reference and a fine vs medium-fine breakdown, see our dedicated guide: Best Grind Size for AeroPress (Fine vs Medium). For a broader walkthrough of every grind level side by side, see Coffee Grind Sizes Explained.
The AeroPress Coffee-to-Water Ratio
A “ratio” just means how much coffee you use compared to how much water. For AeroPress, the sweet spot for beginners is 1:15 — that's 1 gram of coffee for every 15 grams of water.
If you don't have a scale yet, the included AeroPress scoop holds about 11 to 12 grams of coffee — most beginner recipes call for one scoop into water filled to the “4” mark on the chamber. That's a slightly stronger 1:14 ratio and works well as a starting point.
Here's a simple chart for the most common AeroPress brews:
| Style | Coffee (g) | Water (g) | Ratio | Drink Type |
|---|---|---|---|---|
| Strong shot | 15 g | 50 g | 1:3 | Espresso-style concentrate (top with hot water for an Americano) |
| Single mug | 14 g | 210 g | 1:15 | One regular cup of coffee |
| Standard recipe | 17 g | 250 g | ~1:15 | One generous mug |
| Long mug | 15 g | 240 g | 1:16 | Lighter, easier-drinking cup |
A few beginner-friendly notes on ratios:
- Want stronger coffee? Try 1:13 (more coffee, less water). Expect a more intense cup that you can drink as is or top with hot water.
- Want lighter coffee? Try 1:17. Still flavorful, but easier to drink by the mugful.
- Always weigh both. Eyeballing scoops gets you close, but a $15 kitchen scale pays for itself in saved coffee within a few weeks.
If ratios are new to you, our Coffee-to-Water Ratio Guide explains the concept from scratch.
Water Temperature and Brew Time
Two more variables — the last two you need to get right for a great cup.
Water Temperature
Aim for water between 185°F and 200°F (85–93°C). That's slightly cooler than what you'd use for a French press or pour-over. Most people don't have a thermometer handy, so here's the easy cheat: boil your water, then let it sit for about 30 to 45 seconds before pouring. That drops it into the right range almost every time.
Why a little cooler? The AeroPress was specifically designed to brew at lower temperatures, which Alan Adler found reduces bitterness and acidity. Water that's too hot will pull out harsh, bitter notes from the grounds. Water that's too cool (below 175°F) will under-extract and taste weak and sour. The 30-to-45-second rest after the boil is one of those small habits that makes every cup better.
Brew Time
The full AeroPress brew should take about 90 seconds total — somewhere around 60 seconds of steep time, plus 20 to 30 seconds of plunge time.
That short steep window is what makes the AeroPress so distinctive. Compare it to the four-minute steep of a French press, the three-minute pour of a V60, or the 24-hour wait for cold brew. With the AeroPress, your coffee is in your mug almost as fast as you can pour the water.
A little more or a little less is fine. Some recipes go to 90 seconds of steep before pressing. World championship recipes get more elaborate. As a beginner, “stir, wait one minute, press” is all you need.
Don't press the plunger too hard. If you're really straining to push it down, your grind is too fine. A proper plunge should take about 20 to 30 seconds with steady, gentle pressure — about the same effort as squeezing a stress ball. If it feels like you're trying to push a stuck pickle jar lid open, stop and grind coarser next time.
The Full AeroPress Brewing Process
Here's the whole method from start to finish. Once you've done it a few times, it takes about two minutes of active attention.
- Boil your water. Use a little more than you need — about 20% extra — because you'll also use some to rinse the paper filter and pre-warm the chamber.
- Place a paper filter in the cap. Drop one paper filter into the AeroPress filter cap and twist it onto the bottom of the chamber.
- Rinse the filter (optional but helpful). Set the AeroPress on top of your mug and pour a small amount of hot water through the filter. This removes any paper taste and pre-warms the brewer.
- Weigh and grind your coffee. Use the chart above to figure out how much you need. Grind to a medium-fine, table-salt texture.
- Add the grounds to the chamber. Pour your ground coffee into the AeroPress, set on top of your mug.
- Pour your hot water and start your timer. Pour all of your water in a single, steady pour. Aim for full saturation — the grounds should be completely soaked.
- Stir for 10 seconds. Use the included stir stick (or any spoon) to give the slurry a gentle stir back and forth. This helps every ground extract evenly.
- Insert the plunger and wait. Put the plunger into the chamber just enough to seal it (about half an inch). The seal slows airflow and keeps the brew temperature stable while it steeps.
- Press at the 1-minute mark. Push the plunger down with steady, gentle pressure over 20 to 30 seconds. Stop pressing when you hear a hissing sound — that's air escaping, which means the brew is done.
- Top off if desired. If you brewed a strong shot (1:3 or 1:5 ratio), add hot water to taste. For a single-mug recipe (1:15), you're already done.
- Eject the puck. Pop off the filter cap, hold the AeroPress over the trash, and push the plunger one more inch. The spent grounds and filter eject as a single tidy puck. Rinse and you're done.
For the full step-by-step beginner recipe with photos, see How to Use an AeroPress: The Beginner's Recipe.
Common AeroPress Problems (And How to Fix Them)
If your first few brews don't taste great, don't give up. Almost every beginner AeroPress problem comes down to one of four things: grind too fine or coarse, wrong ratio, water too hot or cold, or skipping the stir.
| The Problem | Most Likely Cause | The Fix |
|---|---|---|
| Bitter coffee | Grind too fine, or water too hot | Go slightly coarser. Let the kettle rest 30–45 seconds after boiling. |
| Weak or sour coffee | Grind too coarse, or water too cool | Adjust to a medium-fine grind. Try water at 195–200°F. |
| Hard to push the plunger | Grind way too fine | Go coarser. Plunge should take 20–30 seconds with gentle pressure. |
| Plunger drops with no resistance | Grind way too coarse, or paper filter folded incorrectly | Go finer. Make sure the filter is flat in the cap before twisting on. |
| Coffee tastes flat or stale | Old beans, or beans ground a long time ago | Use whole beans roasted within the last 2–4 weeks. Grind right before brewing. |
If your coffee tastes bitter no matter what you do, grind size is the first suspect. If it tastes weak, check your ratio and water temperature. And if your AeroPress is fighting back when you press, you've gone too fine — back off the grinder by a notch or two.
For a deeper dive into why coffee tastes the way it does, see our What Is Coffee Extraction? guide.
AeroPress vs Other Brewing Methods
An AeroPress is a great starting point, but it's not the only way to make coffee at home. Here's how it stacks up against the other methods we cover.
| Method | Best For | Cup Style | Difficulty |
|---|---|---|---|
| AeroPress | Fast brewing, easy cleanup, travel | Clean, smooth, full body without sediment | Easy |
| French Press | Forgiving daily brew for one or many | Rich, heavy, some sediment | Easy |
| Pour-Over | Clarity and nuance, tasting different beans | Light, clean, bright | Medium |
| Moka Pot | Espresso-style coffee without a machine | Dark, concentrated, bold | Medium |
| Drip Coffee Maker | Hands-off brewing, big batches | Balanced, clean, familiar | Very Easy |
The AeroPress sits in an interesting middle place. It gives you a cleaner cup than a French press (because of the paper filter), more body than a pour-over (because of the pressure), and a faster brew than either. That's why a lot of people end up keeping both an AeroPress and one other brewer — different cups for different mornings.
If you want a side-by-side comparison with the most popular alternative, our sibling pillar covers it: French Press Coffee: The Complete Beginner's Guide. For an honest first-look at AeroPress as your daily driver, see Why an AeroPress Is a Great Start for Beginners.
Standard Method vs Inverted Method
You may have heard about the “inverted method” of brewing AeroPress coffee — where you flip the brewer upside down before adding water. Both methods exist, and both work. Here's the short version of the difference.
The standard method is what we describe above. The AeroPress sits on top of your mug. You pour water into the chamber, stir, and press down. A small amount of coffee will drip through during the steep, but most of the brew comes through during the press.
The inverted method flips the brewer so the plunger is on the counter and the open chamber faces up. You pour water in, stir, wait, attach the filter cap, then quickly flip the whole brewer onto your mug and press. The benefit: zero coffee drips through during the steep, so you have full control over the steep time.
For most beginners, the standard method is what we recommend. It's safer (no flipping a chamber full of hot coffee), easier to learn, and produces nearly identical coffee. The inverted method is a fine experiment once you're comfortable, but it's not a meaningful upgrade for daily brewing.
Cleaning and Caring for Your AeroPress
The AeroPress is one of the easiest brewers to clean — almost the entire process is built into how the brewer works. After each brew, pop off the filter cap, hold the brewer over the trash, and push the plunger one more inch. The grounds and used filter eject in one tidy puck. Rinse the chamber and plunger seal, and you're done.
About once a month, take the plunger out and give the rubber seal a closer wash with warm soapy water. Coffee oils build up over time, and a clean seal makes a tighter brew. After a year or two of daily use, the rubber seal can wear down — replacement seals are around $5 from AeroPress directly, and changing one takes about 30 seconds.
The AeroPress is dishwasher-safe (top rack) if you'd rather toss it in. The seal lasts longer with hand washing, but the difference is small.
Beans Matter More Than Gear
This is the single most important thing we can tell a new AeroPress user — and we say it about every brewer for the same reason. Your beans matter more than your AeroPress does.
A $40 AeroPress with excellent fresh beans will make a better cup than a $400 espresso machine with stale supermarket coffee. Every single time. Once you understand this, a lot of the advice you hear online stops feeling confusing — yes, gear helps, but beans are where the flavor actually lives.
Three rules for beginner-friendly coffee beans:
- Whole bean, not pre-ground. Coffee starts losing flavor the moment it's ground. If you can grind right before brewing, your coffee improves by a mile.
- Check the roast date. Look for a bag roasted within the last 2–4 weeks. “Best by” dates are not the same as roast dates — a bean can be “good” for a year but taste flat after two months.
- Medium roast is a safe starting point. The AeroPress can handle light roasts beautifully (the short brew time helps clarity), but medium roasts are the most forgiving as you're learning.
For a deeper dive into picking great beans as a beginner, see our How to Buy Coffee Beans guide and Light, Medium, Dark Roast Explained.
Frequently Asked Questions
Is AeroPress coffee like espresso?
Not exactly — AeroPress can make a strong, concentrated shot that resembles espresso in flavor and intensity, but it doesn't reach the same pressure as a real espresso machine (about 1 bar vs. 9 bars). The result is sometimes called “espresso-style” coffee. It's plenty strong enough to use as the base of a latte or Americano at home, especially if you brew with a 1:3 or 1:5 ratio.
Can I make milk-based drinks with an AeroPress?
Yes. Brew a strong shot using a 1:3 ratio, then add steamed or frothed milk. For our beginner-friendly methods of frothing milk without an espresso machine, see How to Froth Milk Without an Espresso Machine.
What's the difference between the AeroPress Original and AeroPress Go?
The Original is full-size and lives on a kitchen counter. The Go is smaller, packs into its own travel mug, and is built for travel. Both brew the same way and use the same paper filters. If you mostly brew at home, get the Original. If you travel a lot or want to brew at the office, get the Go.
Can I make iced coffee in an AeroPress?
Yes — and it's one of the best ways to make a quick iced coffee at home. Brew a strong shot at a 1:7 or 1:8 ratio directly into a mug filled with ice. The hot brew melts some of the ice and instantly chills the rest. Five-minute iced coffee, no overnight wait.
How long do AeroPress paper filters last?
Each filter is good for one brew. The Original AeroPress comes with 350 filters, which is roughly a year of daily brewing. Refill packs of 350 filters cost about $5 from Amazon. There are also reusable metal filters available if you want to skip paper entirely — these change the cup slightly (a touch more body, similar to a French press), but most beginners stick with paper.
Key Takeaways
- The AeroPress is one of the most beginner-friendly brewers ever made — fast, forgiving, and nearly impossible to break.
- Use a medium-fine grind that looks like table salt. This is the single most important variable.
- Use a 1:15 coffee-to-water ratio (about 17 g coffee to 250 g water) as a starting point.
- Water should be slightly cooler than other brewers — about 185–200°F. Let your kettle rest 30–45 seconds after boiling.
- Total brew time is about 90 seconds: 60 seconds of steep, then 20–30 seconds of gentle press.
- Cleanup takes 10 seconds. Pop the cap, push the plunger, eject the puck.
- Fresh whole beans matter more than any piece of gear. Grind them right before brewing whenever you can.
What to Read Next
Now that you have the big picture, pick the next piece of the puzzle you want to go deeper on. The full AeroPress cluster is rolling out over the next couple of weeks — grind size, ratios, troubleshooting, comparisons, and product picks. Bookmark this page and come back any time.
If you're still deciding between methods, our French Press pillar is a natural next read. For the broader home coffee picture, see Complete Beginner's Coffee Setup Guide.
Whatever you pick, the most important thing is to start. Make a cup. Then make another one tomorrow. You'll be surprised how fast this stops feeling complicated.
Disclosure: This article contains affiliate links. If you purchase through our links, we may earn a small commission at no extra cost to you. We only recommend products we genuinely believe are right for beginners. Full disclosure here.